
Mastering the Flame: A Connoisseur’s Guide to Using a Cooking Tripod with a Fire Cage
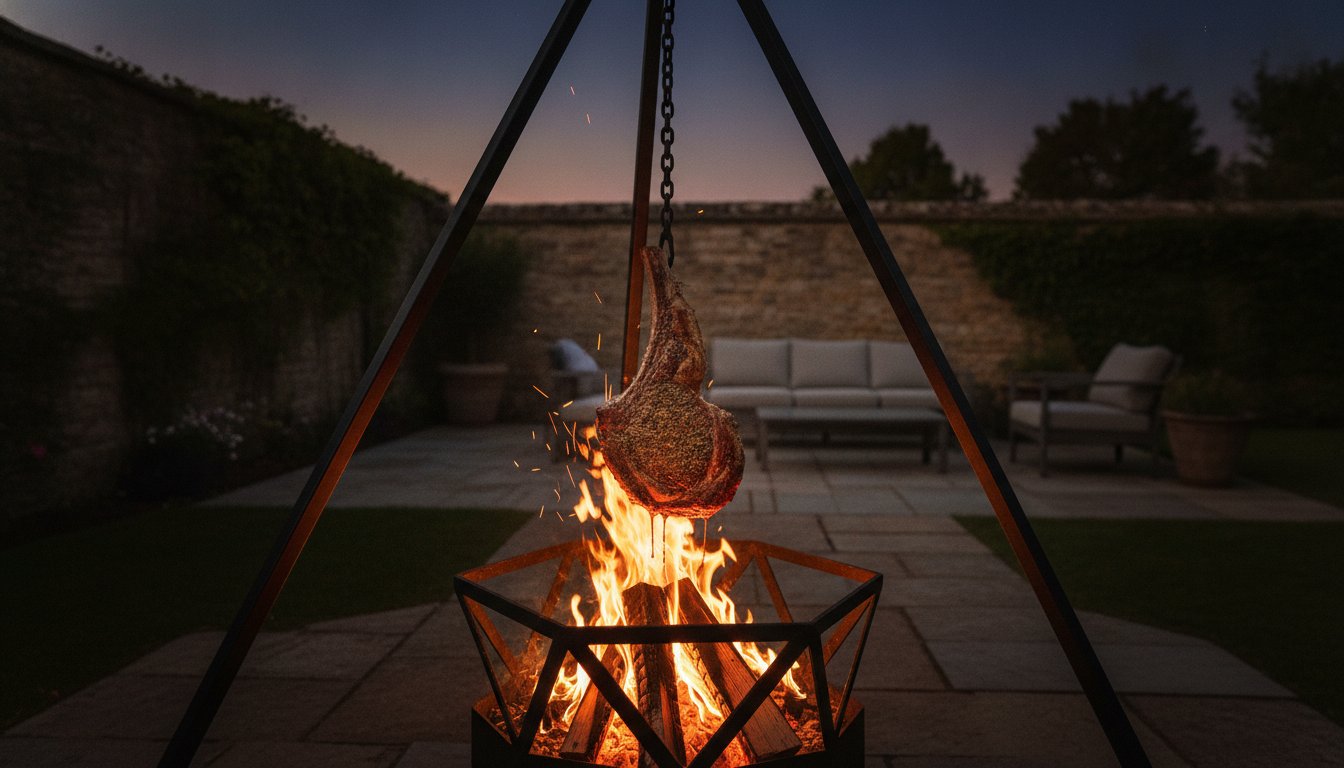
The most impressive meals aren’t born on a standard gas grill; they’re forged in the deliberate, dancing heat of a controlled flame. You’ve likely felt the frustration of a sudden flare-up charring a prime cut or struggled with a wobbly, temporary setup that lacks the gravitas your craft deserves. It’s a common hurdle for those who view outdoor gastronomy as a refined art form rather than a simple weekend task. By using a cooking tripod with a fire cage, you can finally move beyond the limitations of static heat and embrace total thermal control. This guide will teach you how to master professional open-fire techniques, combining the surgical precision of adjustable height with the robust, radiant heat of a dedicated cage. We’ll explore how to dial in specific temperature zones, ensure rock-solid stability for your heavy cast iron, and utilise premium fuels to achieve that elusive, perfectly seasoned bark. It’s time to transform your garden into a sophisticated culinary sanctuary where every meal is a theatrical, high-end event.
Key Takeaways
- Elevate your outdoor kitchen by mastering the vertical axis of heat, turning every meal into a theatrical display of culinary precision and control.
- Discover the professional secret to thermal zoning by using a cooking tripod with a fire cage to manage temperature through height and movement.
- Learn why restaurant-grade fuels like Oak or Eucalyptus charcoal are essential for maintaining the stable, high-intensity energy required for long-duration hanging cooks.
- Understand how to apply robust Angus & Oink rubs to withstand high-airflow environments, ensuring your meats develop a perfectly seasoned, professional-grade crust.
- Identify the essential hardware and accessories needed to curate a safe, stable, and visually stunning outdoor gastronomy sanctuary.
The Philosophy of Open-Fire Cooking: Why the Hanging Tripod?
True mastery of the flame requires a departure from the static, predictable nature of the modern gas grill. While a standard barbecue offers convenience, it often lacks the soul and thermal versatility required for genuine outdoor gastronomy. The Philosophy of Open-Fire Cooking is built upon the relationship between gravity, air, and intense radiant heat. When you’re using a cooking tripod with a fire cage, you’re embracing a dynamic system that treats heat as a three-dimensional tool. This isn’t just about feeding guests; it’s about the theatre of the experience. Your outdoor space becomes a sanctuary where the crackle of wood and the sight of suspended meat create an aspirational social hub.
Static grills often suffer from poor air circulation, leading to uneven pockets of heat and trapped moisture. A hanging tripod solves this by allowing 360-degree airflow around your ingredients. This high-oxygen environment is the secret to professional-grade results. By combining the suspension of a tripod with the concentrated energy of a Fire Cage, you create a cooking station that’s as visually stunning as it is technically superior. It’s the difference between a simple meal and a masterpiece of fire-forged flavour.
The Culinary Science of Suspended Heat
Suspension changes the way heat behaves. In a closed grill, convection currents can often steam the meat, softening the exterior. On a tripod, the constant movement of air ensures that moisture evaporates quickly from the surface. This allows the Maillard reaction to occur more efficiently, resulting in a dark, seasoned crust that is the hallmark of a connoisseur. When fat drippings hit the glowing embers in the Fire Cage below, they vaporise instantly. This creates a plume of aromatic smoke that seasons the meat from the bottom up, providing a depth of flavour that indoor kitchens simply cannot replicate. It’s a raw, sensory joy that defines the pinnacle of outdoor cooking.
Anatomy of a Professional Setup
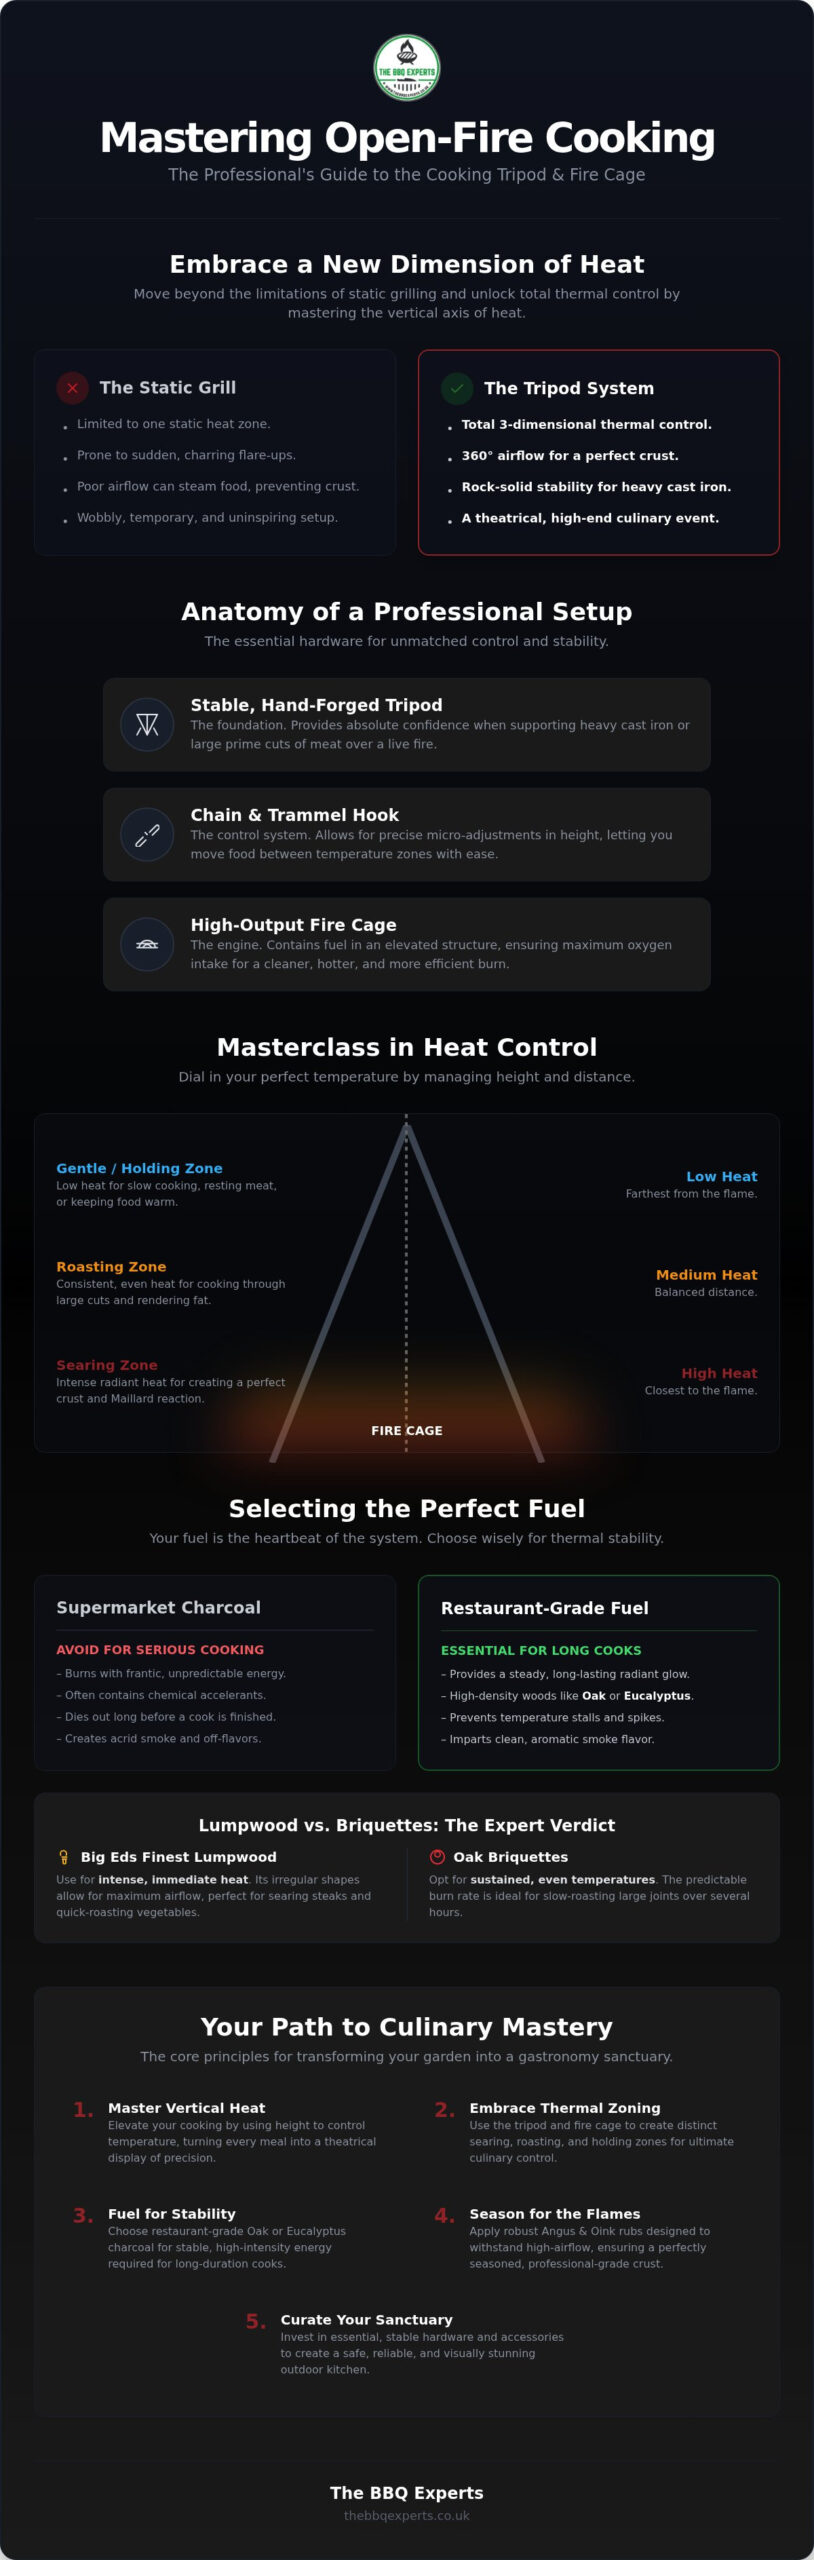
A professional setup demands hardware that matches your ambition. A flimsy frame has no place in a serious outdoor kitchen. You need a stable, hand-forged frame that provides absolute confidence when supporting heavy cast iron or large cuts of meat. The heart of the control system lies in the chain and trammel hook mechanism. These tools allow for micro-adjustments in height, letting you move your food between searing heat and gentle roasting zones with a flick of the wrist. The Fire Cage serves as the high-output engine for this system. It contains your fuel, such as Oak Charcoal or Eucalyptus Charcoal, in a secure, elevated structure. This ensures maximum oxygen intake for the fire, resulting in a cleaner, hotter, and more efficient burn than traditional fire pits can offer.
Selecting the Perfect Fuel for Thermal Stability
Supermarket charcoal is the silent enemy of the outdoor connoisseur. Often laden with chemical accelerants and low-density softwoods, it burns with a frantic, unpredictable energy that dies long before your meat has reached its peak. When you’re using a cooking tripod with a fire cage, your fuel acts as the heartbeat of the entire system. You need high-density, restaurant-grade charcoal that provides a steady, radiant glow rather than a volatile flame. This stability is what allows you to walk away from the fire, confident that the temperature won’t plummet while the fat is rendering. For a deeper dive into these materials, consult The Ultimate Guide to Charcoal to understand how different densities affect your cook time.
Selecting the Perfect Fuel is also your first step in seasoning. The wood species you choose dictates the aromatic profile of your dish. Oak provides a classic, robust smoke that pairs beautifully with beef, while fruitwoods offer a lighter, sweeter touch for poultry. Managing a ‘Long Cook’ on a tripod requires a fuel that can maintain a consistent thermal zone for several hours. This consistency prevents the dreaded ‘stall’ and ensures that large joints of meat develop a uniform crust without being scorched by sudden spikes in temperature.
Lumpwood vs. Briquettes: The Expert Verdict
The choice between formats depends entirely on your menu. Use Big Eds Grade Finest Lumpwood when you require intense, immediate heat for searing steaks or quick-roasting vegetables. Its irregular shapes allow for maximum airflow and a rapid rise in temperature. Conversely, for sustained, even temperatures during an afternoon of slow-roasting, opt for Oak Briquettes. These provide a predictable burn rate that is easier to manage over several hours. Many professionals prefer a hybrid fire, mixing lumpwood for its aromatic smoke with briquettes for their longevity.
Exotic Fuels for the Discerning Palate
To truly elevate your sanctuary, consider fuels with unique thermal properties. Eucalyptus Binchotan is a revelation for those seeking surgical precision. Binchotan is a high-carbon charcoal that burns with pure infrared heat without smoke, allowing the natural flavours of the ingredient to shine through without being masked. For those who prefer an earthy, distinct profile, coffee wood charcoal offers a dense burn and a singular aroma. If you are unsure which fuel profile best suits your upcoming gathering, speak with our specialists for a tailored recommendation.
Masterclass in Heat Control: Managing the Chain and Pendulum
Once your fire cage is glowing with restaurant-grade fuel, the real artistry begins. Mastering the vertical axis is what separates the novice from the connoisseur. When you’re using a cooking tripod with a fire cage, you aren’t tethered to a single, static temperature. Instead, you’re navigating a three-dimensional thermal landscape. By adjusting the chain, you dictate exactly how the energy interacts with your ingredients. If a flare-up occurs, you don’t need to scramble for a water spray that might ruin your seasoning; you simply hoist the grate higher, instantly removing the meat from the danger zone while the fat fire subsides.
Horizontal zoning is equally vital for a successful session. By arranging your Big Eds Charcoal or Oak Briquettes to one side of the Fire Cage, you create a dual-zone setup within a single footprint. This allows you to sear over direct heat before sliding the suspended grate across to a cooler ‘safe zone’ for a gentle finish. It’s this level of surgical precision that makes the tripod the ultimate tool for the outdoor gastronomy enthusiast.
Vertical Temperature Zones
Think of your tripod setup as having three distinct thermal storeys. Mastering these heights allows you to time your meal with the confidence of a professional chef.
- Level 1 (Direct Proximity): Positioned just 5 to 10cm above the glowing embers, this is your searing station. It’s where the intense radiant heat from the Fire Cage creates that professional bark and locks in juices.
- Level 2 (The Sweet Spot): At roughly 20 to 30cm, you’ll find the ideal temperature for standard grilling. This is where chicken thighs render their fat and vegetables caramelise without scorched edges.
- Level 3 (The Canopy): High above the flames, the heat is gentle and ambient. Use this zone for slow-roasting large joints or keeping finished dishes warm while the rest of the menu catches up.
The Art of Rotation and Swing
The ‘Pendulum Effect’ is more than just a visual flourish; it’s a sophisticated heat management tool. Even the most carefully prepared bed of embers will have subtle hot spots. By giving the hanging grate a gentle, periodic rotation, you ensure that no single area of the meat is over-exposed to the concentrated energy below. This prevents the uneven charring often found on static grills.
The swing adds another layer of complexity to your cook. A rhythmic, side-to-side motion creates a self-basting effect. As the meat moves through the air, juices that have risen to the surface are redistributed across the crust, enhancing both flavour and moisture retention. Always ensure you’re equipped with heavy-duty leather gauntlets. Handling chains and trammel hooks at these temperatures requires respect for the radiant energy you’ve unleashed. This methodical approach ensures your outdoor sanctuary remains both a safe and high-performance environment for every guest.
Seasoning for the Flames: Professional Prep with Angus & Oink Rubs
Open-fire cooking is a visceral experience that demands a fearless approach to seasoning. When you’re using a cooking tripod with a fire cage, the constant movement of oxygen across the surface of the meat accelerates evaporation and intensifies the heat’s impact. Subtle, delicate spices often get lost in these thermal currents. To achieve a professional result, your seasoning must be as robust as the flames below. This is why understanding the complexity of The Ultimate Guide to Angus & Oink Rubs is an essential part of your culinary arsenal. These blends provide the high-impact flavour profiles required for true outdoor gastronomy.
High-airflow heat interacts differently with your ingredients than the stagnant air of a domestic oven. Many mass-market rubs rely heavily on cheap fillers and sugars that scorch and turn bitter when exposed to the intense radiant energy of a fire cage. Angus & Oink rubs are crafted with superior ingredients that resist burning at high temperatures. This allows you to build a thick, savoury bark that remains aromatic rather than charred. Timing is everything. Applying your rub at least an hour before the meat meets the heat allows the spices to bond with the surface proteins, creating a resilient crust that won’t flake off during the cooking process.
Why Angus & Oink Rubs Excel on Open Fires
The high-quality ingredients found in these rubs are designed to withstand the raw power of a wood-fired setup. For those preparing a centrepiece Tomahawk steak on the tripod, pairings like ‘Texas Steak’ or ‘Black Gold’ are unparalleled. These rubs use coarse-ground pepper and salt to create a professional-grade crust that stands up to the heavy smoke of Oak or Eucalyptus. If you’re looking for a more versatile profile, ‘The General’ offers a balanced, herby complexity that complements the char of a high-heat sear. These rubs don’t just sit on the surface; they transform under heat into a seasoned veneer that defines the connoisseur’s plate.
Preparing Large Cuts for the Hanging Grate
Success on a suspended grate requires more than just flavour; it requires structural integrity. When your meat is subject to the rotation and swing of the pendulum, it must be secure. Use professional butcher’s twine to truss large joints, ensuring they don’t shift or tear as the fat renders. Beyond the twine, the ‘Salt Brine’ secret is your best defence against the drying effects of high-airflow environments. Salt should be applied at least 40 minutes before cooking to allow for protein denaturation, which helps the meat retain its internal moisture. This preparation ensures that even after hours of hanging over the fire cage, the results remain succulent. If you’re planning a large-scale gathering and need advice on quantities, consult our expert team for a personalised equipment and seasoning plan.
Curating the Ultimate Outdoor Gastronomy Sanctuary
Integrating the Fire Cage for Permanent Setups
While temporary fire pits serve a purpose for the casual hobbyist, the Fire Cage is designed for the serious practitioner. It acts as a robust, permanent alternative that excels in consistent ember production. In a luxury garden design, the aesthetic of professional-grade steel creates an immediate sense of authority and permanence. Beyond the visual appeal, the cage allows you to manage multiple heat sources simultaneously. You might maintain a high-heat zone for searing on one side while nurturing a bed of coals for a slow-hanging roast on the other. It’s a level of versatility that transforms a simple patio into a sophisticated gastronomy sanctuary.
Maintenance for Longevity
The British elements can be unforgiving, but high-end hardware is built to endure with the right care. Your steel grate should be treated with the same respect as a prized cast-iron skillet. Clean the grate while it’s still hot using a sturdy wire brush, then apply a light coating of natural oil to season the metal. This creates a protective barrier against humidity and prevents food from sticking during your next session. During the off-season, store your tripod and fire cage in a dry environment to prevent surface rust. Investing in quality means you aren’t just buying a tool for a single summer; you’re acquiring a legacy piece that will anchor your outdoor gatherings for a lifetime.
Forging Your Legacy in the Fire
You’ve moved beyond the limitations of the traditional barbecue and stepped into the world of professional outdoor gastronomy. By mastering the vertical heat zones and the rhythmic pendulum effect, you’ve gained a level of precision that few home enthusiasts ever achieve. You now understand that the foundation of excellence lies in the marriage of high-density fuels like Big Eds Charcoal and the bold, resilient profiles of Angus & Oink rubs. Using a cooking tripod with a fire cage isn’t just a method; it’s an investment in a lifestyle where your garden becomes the primary social hub of your home. This setup offers the stability and thermal control needed to turn a simple roast into a theatrical masterpiece of flavour and texture.
As official stockists of world-class seasonings and suppliers of restaurant-grade fuels, we provide the specialized knowledge required to elevate your skills. Speak to our specialists to curate your professional open-fire setup and ensure every gathering is anchored by quality craftsmanship. Your journey to becoming a master of the flame starts with the right tools and a genuine passion for the craft. We’re ready to help you build a sanctuary that will endure for a lifetime.
Frequently Asked Questions
Can I use a hanging tripod grill with a standard fire pit or only a fire cage?
You can use a hanging tripod with a standard fire pit, though the fire cage is the preferred choice for the serious connoisseur. The fire cage’s elevated, open-mesh design ensures maximum oxygen intake, producing a cleaner and more consistent heat bed than traditional pits. This superior airflow is vital when using a cooking tripod with a fire cage to achieve professional-grade thermal zoning and avoid the acrid smoke of a suffocated fire.
How do I stop the food from swinging too much on the tripod chain?
To minimize excessive swinging, ensure your ingredients are balanced centrally on the grate before suspension. If the pendulum effect becomes too pronounced, use a pair of long-reach tongs to gently steady the rack rather than grabbing the chains. Controlled, deliberate rotations are more effective for even cooking than large, sweeping movements, which can lead to instability and uneven heat exposure.
What is the best wood to use for cooking on a tripod grill?
High-density hardwoods like Oak and Eucalyptus are the gold standards for tripod cooking. Oak Charcoal provides a robust, classic aroma that complements beef and venison, while Eucalyptus offers an incredibly clean, high-intensity burn. These restaurant-grade fuels provide the sustained radiant energy required to maintain temperature throughout the long, suspended roasting processes favoured by outdoor gastronomy experts.
Is it safe to cook with a tripod grill on a wooden deck or patio?
Cooking with an open fire on a wooden deck is not recommended without substantial thermal protection. Even though a fire cage elevates the embers, stray sparks and radiant heat can damage or ignite timber surfaces. Always position your setup on a non-combustible base, such as stone, brick, or a professional-grade fire mat, to ensure your outdoor sanctuary remains safe and pristine.
How do I clean a hanging BBQ grate after cooking over an open fire?
The most effective way to clean your hanging grate is to address it while the metal is still hot. Use a heavy-duty wire brush to strip away carbon and food residue immediately after the cook is finished. Once clear, apply a light coating of natural oil with a cloth to season the steel, which prevents rust and creates a non-stick surface for your next gathering.
Can I hang a Dutch oven from a cooking tripod as well as a grill grate?
You can certainly hang a heavy cast-iron Dutch oven from your tripod. These frames are engineered for significant weight, making them perfect for slow-simmered stews or sourdough baking over open embers. Simply swap the grill grate for a sturdy trammel hook and ensure the chain is securely locked into the tripod head before adding your ingredients.
How much charcoal do I need for a typical tripod cooking session?
A typical three to four-hour session usually requires approximately 3kg to 5kg of restaurant-grade fuel like Big Eds Charcoal. This amount provides a deep, reliable ember bed within the fire cage that can be easily replenished. For shorter sears, you’ll need significantly less, but it’s always wise to have a 20kg box on hand to maintain thermal stability throughout the afternoon.
What are the best meats to cook on a hanging tripod grill for beginners?
Thick-cut steaks and bone-in chicken thighs are the finest choices for those new to using a cooking tripod with a fire cage. These cuts are naturally resilient and benefit immensely from the 360-degree airflow and gentle movement of the suspended grate. They allow you to practice height adjustments and heat management without the risk of drying out the meat too quickly.
Disclaimer
This article was produced with AI assistance. We use AI and Third Parties to help deliver more content to our BBQ website and community, but we always aim to ensure accuracy and quality as much as we can. If you spot anything that doesn't seem right, we'd love to hear from you

Recent News & Updates

Our Story, Values and Beliefs
Here at the BBQ experts we have a passion for BBQ food, outdoor living and spending time with family and friends. We offer you; A...
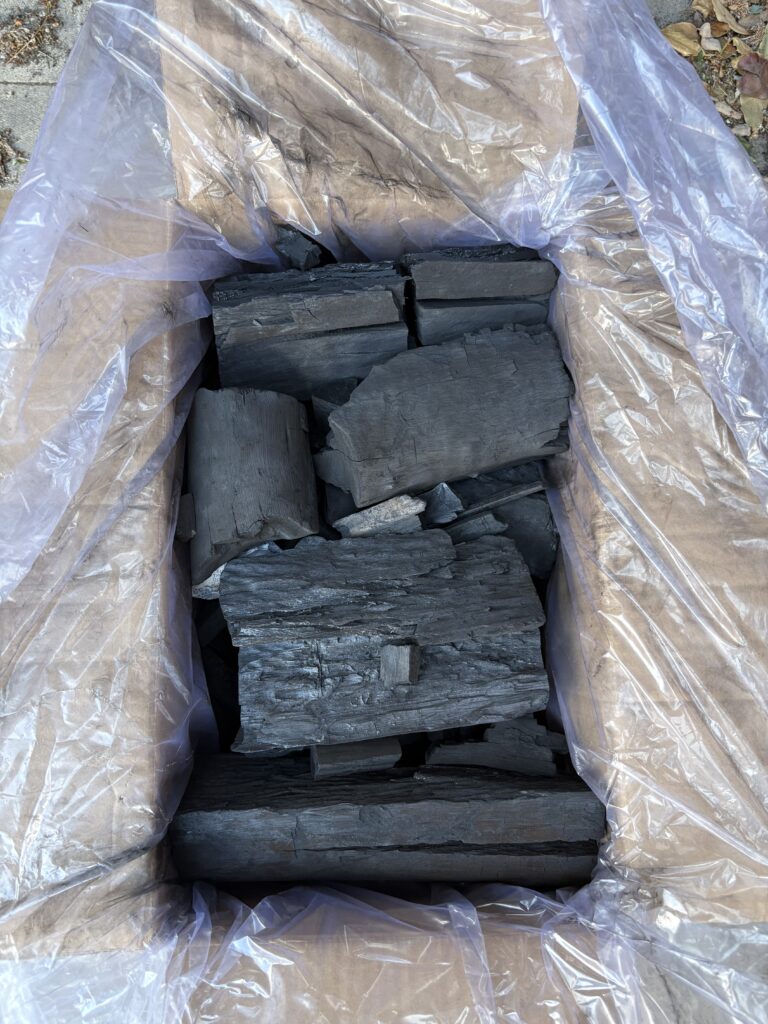
FAQ: Why does Big Ed’s Charcoal have a mix of big and small lumps?
Big Ed’s is all about top-quality, long-burning charcoal, made from a mix of Eucalyptus and Mangrove wood. Each 10kg box is packed with...