
Mastering the Art of Hanging Meat Over an Open Fire: A Connoisseur’s Guide
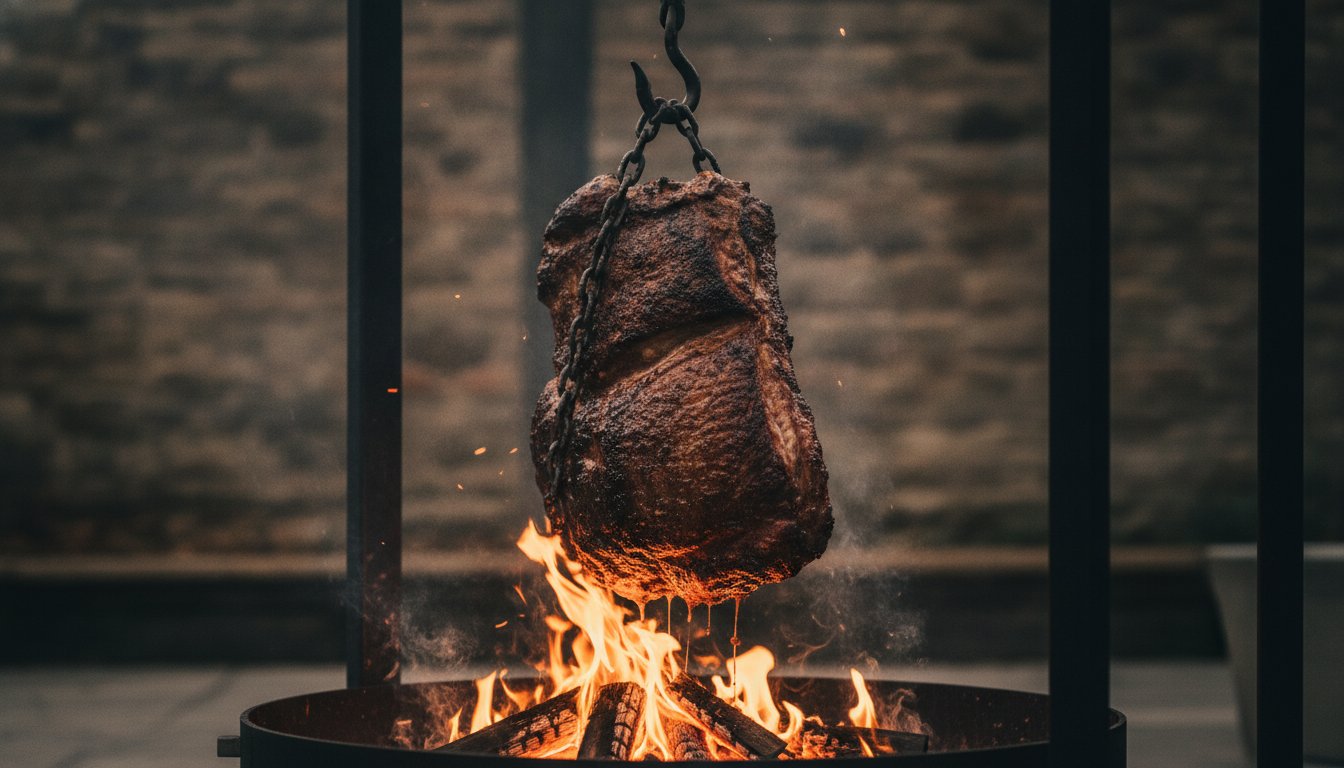
Why would you entrust a premium, record-priced cut of beef to the blunt force of a standard grill grate when you could orchestrate a masterpiece of radiant heat instead? You already know that true outdoor gastronomy is a sensory ritual, a blend of patience and precision that turns a meal into a landmark event. However, with fresh beef prices up 13 percent this year, the pressure to avoid a charred exterior or a raw center is palpable. No one wants to waste an expensive investment because of inconsistent heat or a lack of professional equipment.
This guide promises to elevate your craft, showing you how hanging meat over an open fire can yield professional-grade results that a standard BBQ simply cannot match. By mastering the use of a Fire Cage and understanding the subtle dance of thermal distribution, you’ll gain the confidence to manage a live flame for six hours or more. We’ll walk through the selection of high-performance fuels like Oak Charcoal, the critical USDA safety temperatures for 2026, and the technical secrets to achieving that perfect, succulent finish every single time.
Key Takeaways
- Understand the “vertical advantage,” where gravity transforms rendering fat into a natural, continuous baste for unparalleled tenderness and depth of flavour.
- Shift from rudimentary DIY setups to the precision of a professional Fire Cage, ensuring the structural stability needed for multi-level heat management.
- Master the nuance of fuel selection by distinguishing between long-lasting ember beds for heat and aromatic woods that infuse your cook with complex, smoky notes.
- Learn the professional “Hand Test” and spinning techniques to maintain total culinary control when hanging meat over an open fire for extended durations.
What is Hanging Meat Over an Open Fire?
Hanging meat over an open fire is a visceral, ancient ritual that transcends simple outdoor cooking. It’s the art of suspending a prime cut of protein near a live heat source, allowing radiant energy to work its magic over several hours. Unlike traditional smoking, which relies on enclosed convection and heavy wood smoke, this method is about the purity of the flame. It creates a crisp, seasoned “bark” while maintaining a succulent, buttery interior. This tradition has deep roots, from the expansive Asado plains of South America to the grand medieval hearths of Europe. Given that fresh beef prices have risen 13 percent over the last year, mastering this technique is about more than just flavour; it’s about respecting the investment you’ve made in quality produce.
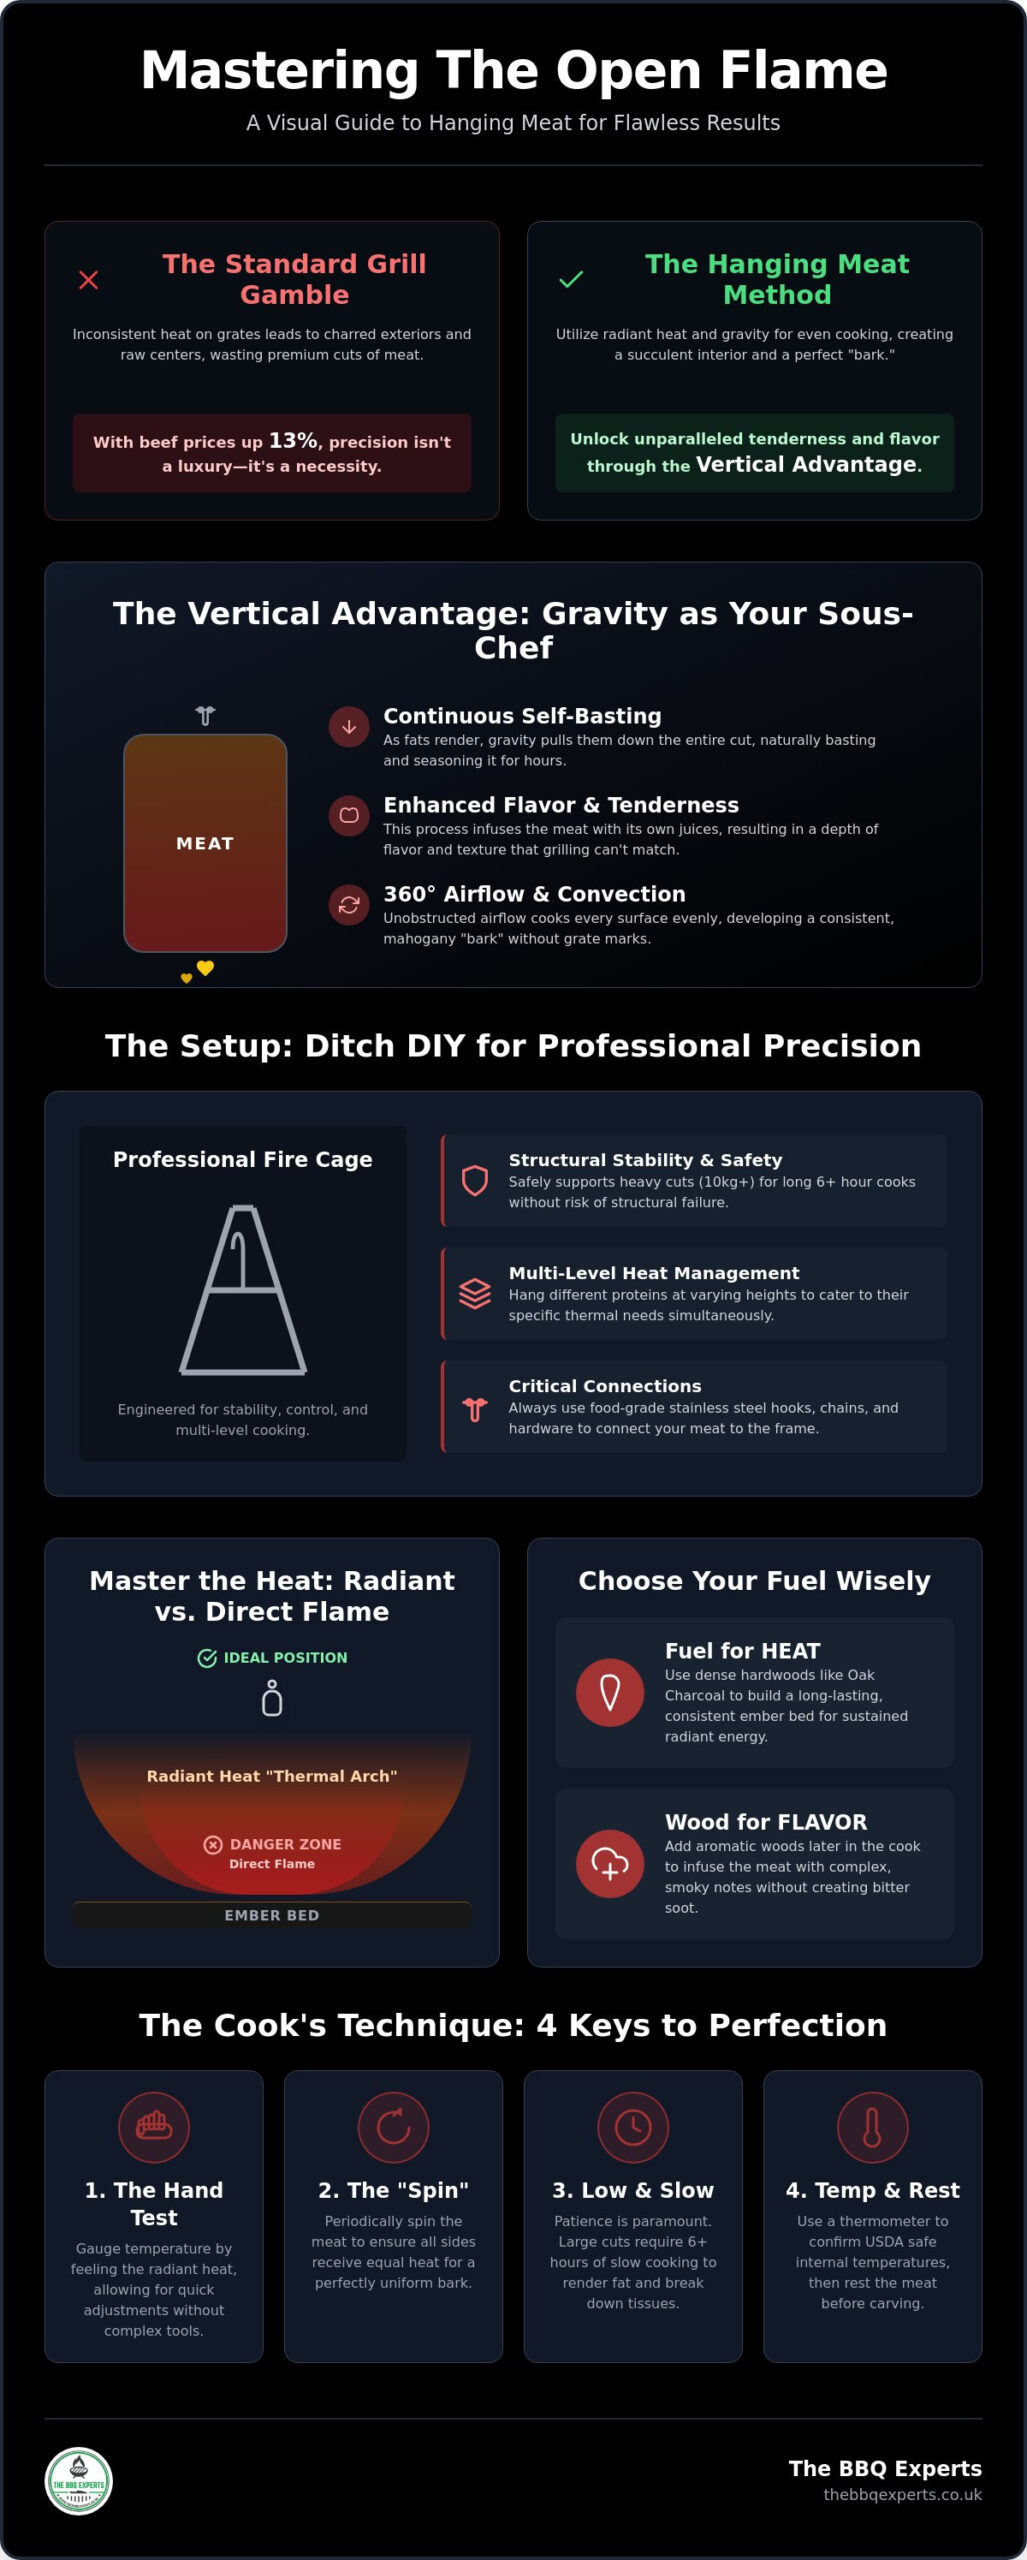
The true secret to this method lies in the “vertical advantage.” As the meat hangs, gravity becomes your most valuable sous-chef. Fats and juices don’t just drip away into the ash; they render slowly and travel down the entire length of the joint. This process provides a continuous, natural baste that seasons the meat from the outside in. The result is a depth of flavour and a refined texture that horizontal grilling simply cannot replicate. It’s a patient, methodical process that rewards the connoisseur with a level of culinary precision usually reserved for professional kitchens.
Radiant Heat vs. Direct Flame
Precision is everything when hanging meat over an open fire. We never hang meat directly over the “tongues” of the flame. That’s a recipe for scorched fat and bitter carbon. Instead, we look for the “thermal arch,” which is the sweet spot where the heat is intense but steady. This radiant energy penetrates deep into the muscle fibers of large joints, cooking them evenly without destroying the surface. It shares many fundamental principles with Rotisserie cooking, where the distance from the heat source and the steady exposure ensure a perfect finish. You’re looking for a consistent glow from the embers, not a wild blaze.
Why Vertical Cooking Wins for Large Cuts
Large joints of meat require a level of uniformity that standard grill grates often fail to provide. When you use a vertical setup, you eliminate the “hot spots” and “cold zones” caused by metal contact. This creates a superior environment for thermal distribution.
- Unrivalled Airflow: 360-degree convection ensures every inch of the surface develops a consistent, mahogany bark.
- Thermal Stability: The distance from the fire allows for a more forgiving temperature gradient, essential for 6+ hour cooks.
- The Social Centerpiece: There’s an undeniable sensory appeal to a Fire Cage laden with slow-cooking ribs or a whole leg of lamb.
It transforms your garden into a private retreat and a refined artistic space. The sight and scent of the meat as it spins slowly over the embers create an atmosphere of high-end luxury and shared anticipation. It isn’t just dinner; it’s a performance of skill and a celebration of the exterior environment as the heart of the home.
The Essential Setup: Hardware for Professional Results
While the rustic charm of a DIY tripod made from hardware store chains might appeal to the weekend camper, the serious practitioner of hanging meat over an open fire demands more. Inconsistent heat and structural failure are the enemies of a perfect cook. Transitioning to a professional-grade Fire Cage represents a significant upgrade in both safety and culinary precision. These robust structures are engineered to maintain thermal stability while supporting substantial cuts, such as a 10kg whole lamb leg, for the six or more hours required to reach perfection. Precision is paramount. You aren’t just cooking; you’re managing a complex thermal environment.
The Fire Cage Advantage
A Fire Cage isn’t merely a frame. It’s a tool for sophisticated heat management. Its multi-level design allows you to suspend different proteins at varying heights, catering to their specific thermal needs. For instance, you might hang a rib rack in the upper thermal arch while utilizing the intense heat at the base for a quick sear using a Hibachi Grill. This versatility ensures that you aren’t just cooking meat; you’re orchestrating a multi-course experience. By adjusting the proximity of the meat to the embers, you can follow safe smoking techniques to ensure that large joints stay out of the bacterial danger zone while developing that coveted, deep-red smoke ring. It allows for a level of control that DIY setups simply cannot match.
Hooks and Connections
The hardware that connects your meat to the frame is just as vital as the flame itself. You should only ever use food-grade stainless steel. Inferior metals can impart unpleasant metallic off-flavours or, worse, fail under high heat. Single S-hooks are excellent for smaller cuts, but for wider joints like pork belly or rib racks, V-hooks or heavy-duty meat hooks provide the necessary balance to prevent the meat from spinning erratically. Always perform a weight-bearing check before you light the fire. If your setup can’t comfortably support 10kg or more, it isn’t ready for a connoisseur’s kitchen. Quality craftsmanship in your accessories is the bridge between a hobbyist and a master.
Choosing between a traditional ground fire and a dedicated metal fire pit is often a matter of environment. A ground fire offers a primal connection to the earth, but a raised metal fire pit provides superior airflow control. This control is essential when you’re managing a delicate balance of radiant heat and convection. If you’re looking to transform your outdoor space into a refined culinary retreat, speaking with an expert about the right installation for your garden is a logical first step. Investing in the right foundation ensures that every social gathering becomes a masterclass in gastronomy.
Fuel Management: Choosing the Right Energy Source
Fuel is the heartbeat of your outdoor kitchen. In the world of hanging meat over an open fire, your choice of wood or charcoal isn’t just a heat source; it is your primary seasoning. To achieve professional results, you must distinguish between “heat fuel” and “flavour fuel.” Embers provide the consistent radiant energy required for a long, controlled render, while smoke-producing logs impart the delicate aromatic profile that defines high-end gastronomy. Quality is non-negotiable. Using inferior, unseasoned wood or chemical-laden starters will compromise the integrity of your meat before the first hour has even passed.
Begin your ritual with natural firelighters to ensure a clean, odourless start. This avoids the chemical taints that often plague amateur setups. Mastery requires a “continuous fire” strategy. You don’t simply light a pile and wait. Instead, you maintain a secondary ember bed, feeding it fresh fuel so you can shovel hot, active coals under your hanging joints without causing temperature spikes or soot clouds. Following established guidelines for Food safety for outdoor cooking is vital here. Maintaining a steady thermal arch ensures that large cuts stay at safe temperatures while the exterior develops its signature mahogany bark.
The Power of Oak and Hardwoods
For those seeking the gold standard of thermal distribution, Oak Briquettes are the definitive choice. Oak provides a clean, reliable heat that lasts for hours, making it the perfect companion for robust proteins like beef and lamb. It offers a traditional flavour profile that is sophisticated yet familiar. To avoid the bitter creosote that ruins a good meal, ensure your wood is bone-dry and well-seasoned. You want a “blue smoke” that whispers over the meat, rather than a heavy grey cloud that smothers it. Precision in airflow management is what separates a seasoned connoisseur from a novice.
Specialist Fuels for Exotic Aromas
If you wish to elevate your cook further, consider specialist fuels. Starting with Big Eds Charcoal provides a high-heat, restaurant-grade foundation that is remarkably clean. For a more adventurous aromatic profile, integrating Coffee Charcoal or Eucalyptus can introduce subtle, exotic notes that surprise and delight the palate. Use a dedicated coal chimney to pre-burn these fuels until they are glowing white. This technique allows you to add energy to your fire cage area without the risk of acrid smoke or ash contamination. It is this attention to detail that transforms a simple meal into a private retreat for the senses.
Preparation: Seasoning and Hanging Techniques
The success of your culinary ritual begins long before the first ember is lit. When hanging meat over an open fire, selecting the right cut is paramount. You aren’t looking for lean steaks here. Instead, you want fatty, bone-in joints like a whole rib of beef, a leg of lamb, or a substantial pork shoulder. These cuts possess the structural integrity to withstand hours of suspension and the intramuscular fat required to baste the meat as it renders. The bone acts as a thermal conductor, helping to cook the joint from the inside while the radiant heat works the exterior.
Surface preparation is the next critical step. We recommend the “Dry Brine” method; apply high-quality sea salt to the meat at least 12 to 24 hours before cooking. This process draws moisture out, creates a concentrated brine, and then reabsorbs it, deeply seasoning the muscle. Most importantly, it dries the surface, which is the secret to developing a professional-grade bark that won’t turn acrid under the intense radiant heat of your Fire Cage. This methodical approach ensures your meal is as visually stunning as it is delicious.
Elevating Flavour with Premium Rubs
While salt is the foundation, a connoisseur knows that complex layers of flavour define a masterpiece. Using Angus & Oink Rubs allows you to introduce sophisticated aromatic profiles engineered for high-end outdoor cooking. When choosing a rub for an open fire, avoid those with high sugar content. Sugar will carbonise and turn bitter during a six-hour cook. Instead, look for herb-heavy or pepper-based blends that can withstand the steady “smoke kiss” of your Oak or Eucalyptus charcoal. Layering is key; apply your rub generously after the dry brine has done its work, and consider a light spritz of apple cider vinegar or water every hour to keep the surface supple without washing away your seasoning.
Securing the Cut
Gravity is your ally for basting, but it can be your enemy if your connections are weak. For heavy rib racks or larger joints, the “Double Hook” method is essential to distribute weight evenly and prevent the meat from tearing. We often use butcher’s twine to create a secondary safety harness, reinforcing the primary hooks as the connective tissues begin to soften during the render. To achieve the most secure anchor point possible, you must pierce the hook directly through a sturdy bone gap or a thick tendon rather than just the muscle meat. This ensures your investment doesn’t end up in the ash bed mid-cook.
To maintain total control over the process, integrate a wireless temperature probe into the thickest part of the joint. This allows you to monitor internal progress without the need to remove the meat from the thermal arch. If you’re unsure which seasoning profiles or hooking techniques best suit your specific setup, reach out to our team of specialists for tailored advice. Precision in preparation is the bridge to a truly elite gastronomic experience.
The Cooking Process: Timing, Tending, and the “Spin”
The transition from preparation to execution is where the connoisseur’s patience is truly tested. Establishing a formidable ember bed is your first priority. You cannot rush this stage. Before the meat is ever introduced to the thermal arch, you must build a deep, glowing foundation using high-quality Oak Charcoal or restaurant-grade lumpwood. This ensures a steady release of radiant heat without the erratic temperature spikes of a fresh flame. Once the embers are white and pulsing with heat, you’re ready to begin the ritual of hanging meat over an open fire.
Gauging the intensity of your fire requires a tactile approach known as the “Hand Test.” Safely place your hand at the exact position where the meat will hang. For a slow, six-hour render, you should be able to hold it there for approximately 4 to 6 seconds before the heat becomes too intense to bear. If you can only manage 2 seconds, the fire is too fierce; if you can hold it for 10, you lack the energy required to break down tough connective tissues. This sensory feedback is more reliable than any entry-level thermometer for understanding the nuances of radiant energy.
Mastering the Rotation
A static joint is a vulnerable joint. To achieve a perfectly uniform bark, you must implement “The Spin.” By using a long, doubled length of butcher’s twine to suspend your meat from the Fire Cage, you create a natural, self-rotating rotisserie effect. Gently wind the meat in one direction until the twine is taut, then release it. The joint will slowly unwind and then rewind itself, ensuring every side receives equal exposure to the heat. This constant, rhythmic motion prevents “hot spots” and allows the rendering fats to travel across the entire surface of the meat. You should aim to re-wind the spin every 15 to 20 minutes to maintain this elegant, back-and-forth momentum.
Fire Tending During the Long Haul
Managing a live fire for the “long haul” requires a delicate touch. When adding fresh Big Eds Charcoal to replenish your ember bed, never toss it directly onto the fire. This creates a “dust cloud” of ash that will settle on your meat, ruining the flavour and texture of the bark. Instead, use a long-handled shovel to gently place fresh fuel at the periphery, allowing it to ignite and pre-burn before moving it into the center. Airflow management is equally critical. Use external shields or the adjustable features of your cage to block sudden gusts of wind, which can sap heat or cause dangerous flare-ups.
Elevate Your Outdoor Gastronomy
Mastering the art of hanging meat over an open fire is the ultimate progression for any outdoor enthusiast. It isn’t just about the meal; it’s about the patient, rhythmic ritual of tending the embers and watching the “Spin” create a masterpiece of radiant heat. By moving away from rudimentary DIY setups and embracing the structural precision of a professional Fire Cage, you’ve secured the stability needed for elite results. You now possess the specialized knowledge to manage the thermal arch with total confidence.
As a dedicated specialist retailer, we’re here to bridge the gap between professional equipment and your home retreat. Our expert-curated selection includes everything from Hibachi Grills to the full range of Angus & Oink Rubs. We even offer UK-wide delivery on premium charcoal pallets to ensure your fuel source is never compromised. Explore our professional Fire Cages and Premium Fuels to start your live-fire journey. Your garden is ready to be transformed into a refined social hub. It’s time to claim your place as a true master of the flame.
Frequently Asked Questions
How long does it take to cook a whole leg of lamb by hanging?
A whole leg of lamb typically requires 4 to 6 hours of patient roasting to reach perfection. The exact duration depends on the joint’s weight and the consistency of your ember bed. You’re aiming for a safe minimum internal temperature of 145°F, as verified by the USDA in July 2026. This slow, vertical process ensures the connective tissues fully render into succulent, buttery goodness.
Is it safe to hang meat over a fire in a regular backyard?
It’s generally safe in a UK garden, but you must be mindful of the Clean Air Act and local Smoke Control Areas. While hanging meat over an open fire for culinary purposes is often exempt, excessive smoke can lead to complaints or local council intervention. Always ensure your setup is positioned on a stable, non-combustible surface like a stone patio, well away from overhanging branches or wooden fences.
What is the best height to hang meat above the fire?
The ideal height is usually between 60cm and 90cm above the glowing embers. Rather than relying on a fixed measurement, use the Hand Test to find the thermal arch where you can safely hold your hand for 5 seconds. This “sweet spot” ensures deep heat penetration without the risk of scorching the delicate surface of your protein or ruining your carefully applied rubs.
Can I use a Fire Cage for things other than hanging meat?
Your Fire Cage is a multi-functional outdoor kitchen hub that serves as the centerpiece of your garden retreat. Beyond primary joints, it’s perfect for suspending seasonal vegetables or whole pineapples to create caramelised desserts. The base area is designed to accommodate a Hibachi Grill or cast-iron cookware, allowing you to manage multiple courses simultaneously within one refined, artistic space.
How do I prevent the meat from falling into the fire?
Security is achieved through the “Double Hook” method and high-quality butcher’s twine. Always pierce your stainless steel hooks through a sturdy bone gap or a thick tendon rather than just the muscle meat. Reinforcing the connection with twine prevents the meat from tearing through as it softens and becomes tender during the long, slow render over the radiant heat.
What kind of wood should I avoid for open-fire hanging?
You must strictly avoid softwoods like pine, fir, or cedar for any form of hanging meat over an open fire. These species contain high levels of resin and sap that produce a bitter, acrid smoke and dangerous creosote buildup on your food. For a clean, sophisticated flavour, only use well-seasoned hardwoods like Oak or specialist options like Eucalyptus Charcoal which provide a steady, predictable burn.
Do I need to wrap the meat in foil at any point?
Wrapping in foil is rarely necessary when hanging meat, as the technique relies on the development of a thick, seasoned bark. This mahogany crust forms through continuous exposure to radiant heat and optimal 360-degree airflow. If the exterior is darkening too quickly, simply adjust the height of the hooks or increase the frequency of your “Spin” to manage the thermal distribution without steaming the meat.
How do I clean my meat hooks and Fire Cage after use?
Clean your food-grade stainless steel hooks with hot, soapy water immediately after use to maintain hygiene and prevent metallic off-flavours. For the Fire Cage itself, wait until the unit is completely cool before removing the ash bed. A stiff wire brush is usually sufficient to clean the frame, followed by a light coating of food-safe oil to protect the craftsmanship and prevent oxidation between cooks.
Disclaimer
This article was produced with AI assistance. We use AI and Third Parties to help deliver more content to our BBQ website and community, but we always aim to ensure accuracy and quality as much as we can. If you spot anything that doesn't seem right, we'd love to hear from you

Recent News & Updates

Our Story, Values and Beliefs
Here at the BBQ experts we have a passion for BBQ food, outdoor living and spending time with family and friends. We offer you; A...
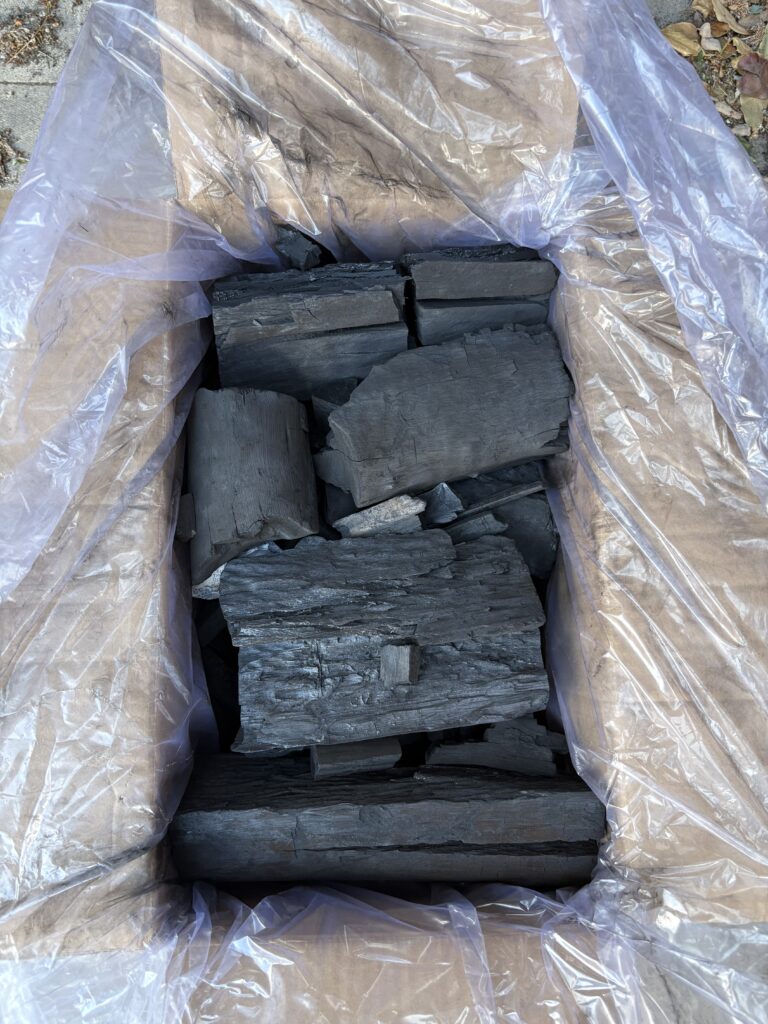
FAQ: Why does Big Ed’s Charcoal have a mix of big and small lumps?
Big Ed’s is all about top-quality, long-burning charcoal, made from a mix of Eucalyptus and Mangrove wood. Each 10kg box is packed with...