
Assembling a Fire Cage BBQ: The Master’s Guide to Live-Fire Setup
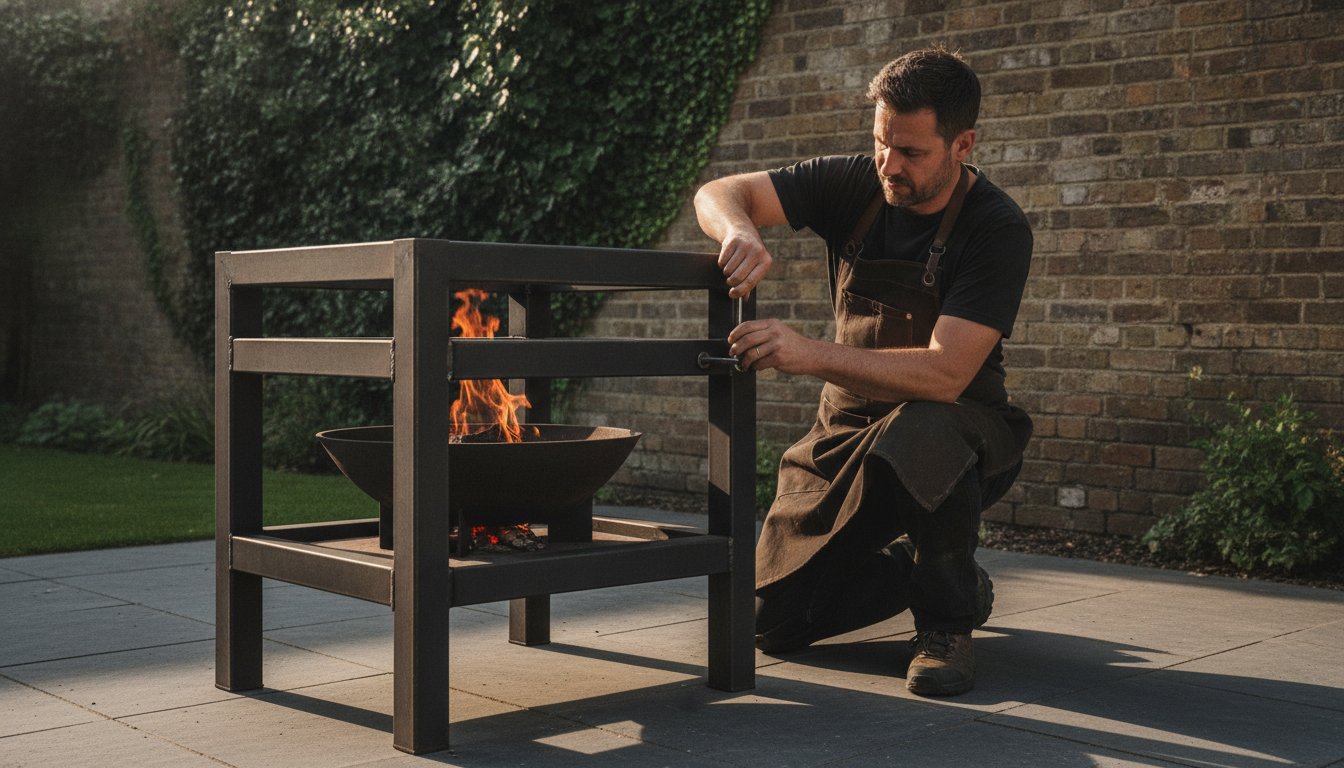
The difference between a mere backyard cookout and a masterclass in live-fire gastronomy lies in the structural integrity of your equipment. It’s perfectly natural to feel a flicker of intimidation when faced with a professional kit and the 300 bolts required for assembling a fire cage bbq. You want a setup that stands rock-solid against the intense thermal demands of premium oak briquettes, not something that compromises your culinary vision under extreme heat.
We agree that a tool of this caliber deserves a precise, methodical approach to its creation. This guide is your master’s roadmap to ensuring every fire brick is perfectly aligned for peak efficiency and every joint is secured for a lifetime of superior outdoor cooking. We’ll walk through the exact placement techniques and structural checks needed to transform these premium materials into a high-performance culinary hub. By the end, you’ll have the absolute confidence to ignite your first seasoning fire and begin your journey as a true connoisseur of the flame.
Key Takeaways
- Understand how the modular anatomy of a fire cage provides the precision heat control required for professional-grade outdoor gastronomy.
- Secure your investment by following a methodical sequence for assembling a fire cage bbq, starting with a rock-solid base and heavy-duty frame.
- Optimize your thermal mass by correctly installing fire bricks with a specific 5-10mm air gap to prevent heat damage to the outer structure.
- Learn to configure hanging rods and brasero positions to master diverse techniques like slow-hanging meats or “dirty” cooking.
- Protect the integrity of your hardware with a dedicated burn-in process and oil seasoning before your very first cook.
What is a Fire Cage BBQ? Understanding the Anatomy of Live-Fire
A professional fire cage is far more than a simple vessel for burning wood; it is a modular, high-performance platform engineered for the absolute precision of live-fire heat control. While a standard fire pit is designed for ambiance, the fire cage is a dedicated culinary instrument. It allows the seasoned connoisseur to manipulate flame and coal with the same level of accuracy found in a high-end indoor kitchen, yet with the raw, sensory soul of the outdoors. Before you begin assembling a fire cage bbq, it is vital to understand that every rail, bolt, and brick serves a specific aerodynamic or thermal purpose.
The defining feature of this setup is the Brasero, or fire basket. This is the engine of your outdoor kitchen. Unlike traditional grills where you cook directly over logs, the Brasero allows you to burn wood down into clean, consistent embers. These glowing coals then drop to the fire bed, providing a steady heat source that is free from the acrid smoke of unburnt timber. When paired with professional-grade fuel like Big Eds Charcoal, the Brasero ensures a continuous supply of high-energy embers for hours of uninterrupted cooking. This structural sophistication is why heavy-duty laser-cut steel is the industry standard; it provides the rigidity needed to support hundreds of kilograms of thermal mass without flinching.
Key Components of a Professional Setup
The foundation of your unit is the Fire Bed. This heavy-duty surface supports the thermal lining and the fuel itself. Rising from this base are the Rear Ladder Rails, which are perhaps the most critical element for heat management. These rails allow you to move your cooking surfaces vertically, instantly adjusting the temperature by changing the distance between the food and the coals. This architecture supports various cooking methods, from high-heat searing to the gentle, slow-hanging techniques of traditional Asado. By integrating modular accessories like Asado crosses and hanging rods, the cage transforms from a simple grill into a versatile gastronomic theatre.
The Science of Open-Fire Control
Mastery of the flame requires a structure that facilitates perfect airflow. The open-cage design ensures that your embers stay oxygenated and energetic, preventing the “stifled” fire that often plagues cheaper, enclosed units. Verticality is your primary tool here. By utilizing the different temperature zones created by the ladder rails, you can sear a steak at the base while slowly rendering fat on a rack positioned higher up. This precision engineering is essential for durability. High-grade steel and strategic air gaps ensure the frame doesn’t warp even under the intense, 24/7 use of a professional catering environment. When assembling a fire cage bbq, you aren’t just putting together hardware; you are building a controlled thermal environment designed to last a lifetime.
Step-by-Step Structural Assembly: Building the Frame
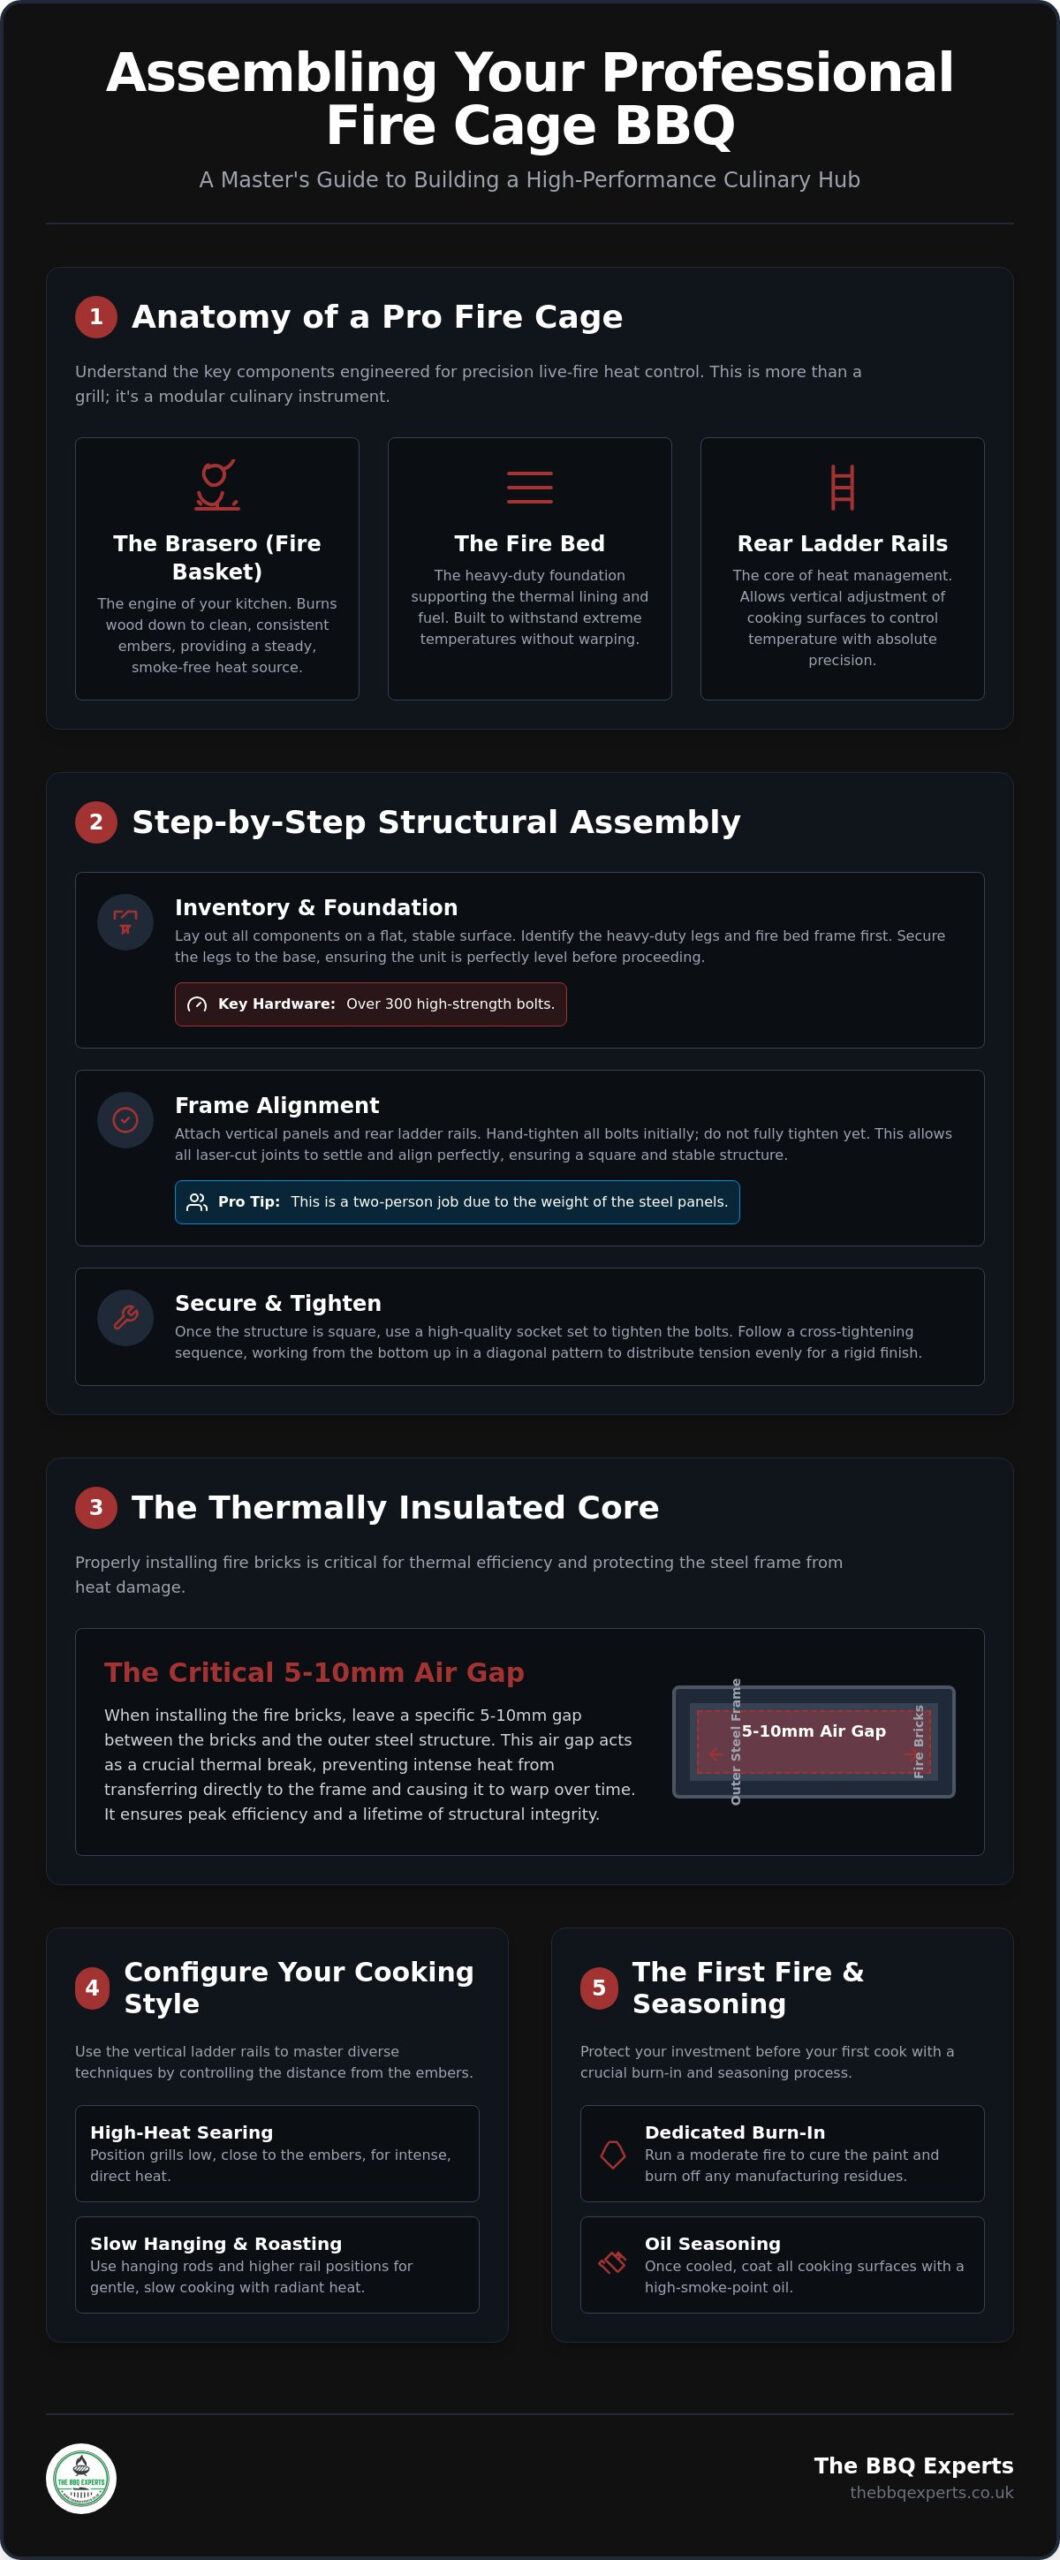
The journey toward a professional-grade outdoor kitchen begins with a meticulous inventory. Laying out your components on a flat, stable surface is non-negotiable. When assembling a fire cage bbq, you’ll encounter a significant volume of hardware, often exceeding 300 high-strength bolts. Organization at this stage prevents the frustration of missing fasteners later. Start by identifying the heavy-duty legs and the fire bed frame. These components form the foundation that must support the immense weight of the fire bricks and fuel. Secure the legs to the base frame first, ensuring the unit is level before proceeding to the vertical panels.
Alignment is an exercise in patience and precision. As you move to the rear ladder rails, which define your cooking heights, resist the urge to tighten everything immediately. Hand-tighten the bolts across the entire frame first. This allows the steel panels to settle and align perfectly with the laser-cut joints. Once the monolithic rails are in place and the structure is square, follow a cross-tightening sequence. Work from the bottom up, tightening bolts in a diagonal pattern to distribute tension evenly. This methodical approach ensures a rigid, professional finish that won’t rack or lean during use.
Managing Heavy Steel Components
The sheer mass of professional-grade steel demands respect. This part of the build is a two-person job; the panels are designed for lifetime durability, which translates to significant physical weight. Attempting to align the fire bed or ladder rails alone risks cross-threading the precision-cut holes. Use a high-quality socket set and a dedicated wrench rather than adjustable tools to ensure a perfect grip on the high-strength bolts. If you find yourself needing guidance on specific component weights or tool requirements, our team of masters is ready to assist with a technical consultation.
Thermal Expansion Considerations
A common mistake when assembling a fire cage bbq is over-tightening the hardware during the initial build. Steel is a living material that expands and contracts as it moves from ambient temperature to the searing heat of a live fire. You must leave microscopic room for the metal to “breathe.” Tighten the bolts until they are firm, but avoid using excessive force that might strip the threads or pin the panels too tightly. This controlled flexibility prevents the structure from warping or “pinging” under extreme thermal stress, preserving the squareness of your cage for decades of service.
The Thermally Insulated Core: Installing Fire Bricks and Air Gaps
Once the heavy-duty frame is square and secured, you must transition your focus to the unit’s thermal heart. The fire bricks are not merely floor tiles; they are the high-performance battery of your outdoor kitchen. These 1200°C-rated refractory bricks are designed to absorb intense energy and re-radiate it back toward your food with surgical consistency. When assembling a fire cage bbq, the way you seat these bricks determines whether your unit merely burns fuel or masters it. A properly lined core ensures that the heat remains focused on the gastronomy rather than bleeding into the surrounding environment.
The defining secret of professional-grade assembly is the “Air Gap.” You should maintain a consistent 5-10mm separation between the outer edge of the bricks and the internal metal panels of the frame. This microscopic barrier acts as a thermal separation zone, preventing the steel from taking the direct, unshielded brunt of the flame. This design choice is what allows the outer surfaces of a premium cage to remain structurally sound while the interior reaches searing temperatures. By protecting the front doors and side panels from direct contact, you ensure the precision laser-cut joints stay aligned for decades of use.
Brick Placement Strategy
Precision matters here. Start your placement from the center of the fire bed and work your way outward toward the edges. This technique ensures that any necessary “half-bricks” or custom-cut corners are relegated to the perimeter where they are easier to secure. Every brick must sit perfectly flush against its neighbor. If you leave significant gaps between the bricks themselves, ash and glowing embers will eventually migrate underneath the lining. Over time, this buildup can lift the floor, compromising the level surface and forcing you to disassemble the core for cleaning. Take the time to seat each 230 x 114 x 65mm brick firmly, ensuring a seamless floor of thermal mass.
Maximising Fuel Efficiency
Configuring Your Fire Cage for Different Cooking Styles
Installing the hanging rods is the first step for those pursuing ancestral techniques. These 16mm OD stainless steel rods are designed to support significant weight, allowing for the gentle, vertical suspension of whole primals or poultry. This style of cooking utilizes the rising convective heat, creating a self-basting effect that’s impossible to replicate on a flat grate. For those who prefer the primal intensity of “dirty” cooking, these rods provide the perfect anchor point for lowering ingredients directly into the energetic heart of the fire bed, just inches above the glowing embers.
The position of your Brasero is equally critical to your success. Placing the fire basket to one side creates a clear thermal gradient, allowing you to manage a continuous supply of fresh embers while maintaining a dedicated “cool zone” for resting meat. Conversely, a central position is ideal for full-span grilling where high, direct heat is required across the entire surface. When assembling a fire cage bbq for traditional Asado, ensure your rear ladder rails are locked and square. This provides the monolithic support needed for an Asado cross, enabling the vertical roasting that defines Argentine outdoor gastronomy.
The Modular Advantage
Precision is found in the details. Premium units like the Arcadian offer seventeen distinct cooking heights, providing a level of heat zone management that rivals professional oven controls. You can effortlessly switch between full-span grates for bulk searing and rotisserie attachments for uniform roasting. Maintaining these components is straightforward; the removable hanging rods should be wiped down while still warm to prevent carbon buildup, ensuring they remain a pristine part of your artistic retreat. This flexibility allows your outdoor space to evolve with your culinary skills.
Optimising Airflow
A master of the flame knows that oxygen is as important as the fuel itself. By adjusting the front doors, you can fine-tune the intake of air, slowing down the burn for a twelve-hour brisket or opening them wide to supercharge your Big Eds Charcoal. Managing the ember bed requires the right tools; a handcrafted long-handle shovel and pick allow you to move glowing coals with surgical precision. To ensure your fire starts with the same level of quality, we recommend using Natural Firelighters for a clean, chemical-free ignition. If you have questions about which accessories best suit your specific cooking style, please reach out to our expert team for personalized advice.
The First Fire: Seasoning and Your Maiden Cook
The culmination of your journey in assembling a fire cage bbq is the first ignition. This moment of truth is not just about heat; it is about finalizing the structural and chemical integrity of your new culinary theatre. Before you introduce any food, you must perform a dedicated “Burn-In.” This moderate fire is designed to clear any manufacturing oils or residues that may have lingered on the laser-cut steel. It is a vital step that ensures your first meal is defined by the pure essence of wood and smoke, rather than industrial byproducts.
As the steel begins to radiate warmth, you must begin the seasoning process. This involves applying a thin, even layer of high-smoke-point oil to all internal steel surfaces. Much like a cast-iron skillet, this creates a protective, non-stick patina that prevents oxidation and simplifies post-cook cleaning. Use a cloth to buff the oil into the warm metal, allowing the heat to bond the lipids to the steel. This ritual not only protects your investment but also marks the transition of the hardware from a collection of parts into a seasoned instrument of gastronomy.
Your choice of fuel for this inaugural burn is critical. We recommend using Big Eds Charcoal or premium Oak Briquettes to establish a clean, consistent thermal mass. Once the unit has reached its peak temperature and begun to cool, perform one final structural check. The expansion of the metal during the first heat cycle can occasionally settle the hardware; re-checking the bolt tension at this stage is the final step in assembling a fire cage bbq for a lifetime of service. It ensures the frame remains square and the ladder rails stay perfectly aligned.
Achieving the Perfect Bark
With the seasoning complete, the maiden cook is your opportunity to witness the fire cage’s true potential. Preparing your meat with professional seasonings like Angus & Oink Rubs allows the complex spices to interact with the unique radiant heat of the fire bricks. This environment creates a superior, mahogany crust on Tomahawk steaks that is difficult to achieve on standard grills. The vertical airflow management we discussed earlier ensures that smoky aromas are pulled across the meat, providing the ultimate sensory experience for you and your guests.
Long-Term Maintenance
Protecting your investment requires a disciplined post-cook routine. Once the embers have completely cooled, remove the ash to prevent moisture retention, which can lead to corrosion over time. A light re-application of oil to the grates while they are still slightly warm will maintain the seasoned finish. For those looking to maintain their setup to the highest professional standards, our The Ultimate BBQ Master Checklist provides a comprehensive guide to seasonal care. By following these methodical steps, your fire cage will remain the refined social hub of your home for decades to come.
Ignite Your Masterpiece: The Path to Live-Fire Mastery
You’ve successfully transitioned from a collection of precision-engineered steel to a fully realized culinary retreat. By methodically assembling a fire cage bbq, you’ve secured a foundation that balances structural integrity with the raw power of the flame. You now understand that the thermal mass of your fire bricks and the modular versatility of your hanging rods are the true secrets to professional results. This setup isn’t just about cooking; it’s about claiming your place as a connoisseur of outdoor gastronomy. The journey from unboxing to the first perfectly seared steak is a testament to your commitment to quality craftsmanship.
We take pride in our curated selection of professional-grade hardware and offer national UK delivery on all premium charcoal and rubs to ensure your first cook is nothing short of superlative. If you require specialist advice from seasoned outdoor cooking connoisseurs to fine-tune your setup, our team is ready to guide your journey. It’s time to step away from the ordinary and embrace the precision of the flame. Your exterior environment is now the primary social hub of your home.
Shop Premium Fire Cages and Fuel at The BBQ Experts
Frequently Asked Questions
Do I need any special tools to assemble a fire cage?
You don’t need highly specialized machinery, but a high-quality socket set and a set of wrenches are essential for a successful build. Standard adjustable wrenches often slip on the high-strength bolts provided with your kit, which can damage the finish. Using the correct metric or imperial socket ensures you can apply the necessary torque without rounding off the heads. This precision is vital for creating the rock-solid foundation required for professional outdoor gastronomy.
How many people are required for fire cage assembly?
We strongly recommend that two people are present when you begin assembling a fire cage bbq. The laser-cut steel panels are incredibly dense and heavy, designed for a lifetime of use rather than ease of transport. Having a second pair of hands is critical for aligning the rear ladder rails and supporting the fire bed while the first set of bolts is hand-tightened into place. It ensures the process is safe and the alignment remains perfect.
Why does my fire cage have so many bolts?
The high number of bolts, often exceeding 300, is a deliberate engineering choice to ensure absolute structural rigidity. Each bolt helps distribute the immense thermal stress that occurs when the cage reaches temperatures over 400 degrees Celsius. This dense fastening network prevents the heavy-duty steel from warping or shifting over time. It creates a unified, monolithic structure that handles the weight of 1200°C rated refractory bricks with ease.
How long does it take to assemble a professional fire cage?
Most enthusiasts should set aside approximately three to five hours for a complete, methodical assembly. While the process isn’t overly complex, the sheer volume of components and the need for precise alignment require a steady, patient pace. Rushing the build can lead to misaligned rails or uneven brick placement. Taking your time ensures that the final result is a perfectly square, professional-grade cooking platform that functions flawlessly for decades.
Can I use the fire cage immediately after assembly?
You shouldn’t cook food immediately after the final bolt is tightened. Every professional setup requires a dedicated burn-in fire to clear manufacturing residues and a subsequent seasoning phase with high-smoke-point oil. This process creates the protective patina needed for longevity and ensures your first meal isn’t tainted by industrial residues. Patience at this stage is the mark of a true connoisseur who values culinary precision over speed.
What is the best fuel to use for the first fire?
Big Eds Charcoal or premium Oak Briquettes are the gold standard for your inaugural fire. These fuels provide a clean, consistent heat source that allows the fire bricks to saturate with energy without the unpredictable sparks of low-grade timber. Starting with high-quality charcoal ensures a stable temperature for the seasoning process, helping the oil bond effectively to the steel surfaces for long-term protection and a superior finish.
How do I prevent the steel from rusting after assembly?
Applying a thin layer of high-smoke-point oil to all internal steel surfaces while they are warm is the most effective way to prevent rust. This seasoning process creates a durable barrier against moisture and oxidation. Between uses, keeping your cage under a high-quality cover and removing ash promptly will further protect the metal. Ash can absorb moisture from the air, creating a corrosive paste that attacks the steel if left sitting for long periods.
Do the fire bricks need to be replaced over time?
Refractory fire bricks are exceptionally durable and rarely need replacement if they’re seated correctly during the initial build. They’re designed to withstand thousands of heat cycles without losing their thermal properties. You’ll only need to replace a brick if it becomes physically cracked or damaged by a significant impact. Ensuring they sit flush during the process of assembling a fire cage bbq prevents ash buildup that could eventually displace the lining.
Disclaimer
This article was produced with AI assistance. We use AI and Third Parties to help deliver more content to our BBQ website and community, but we always aim to ensure accuracy and quality as much as we can. If you spot anything that doesn't seem right, we'd love to hear from you

Recent News & Updates

Our Story, Values and Beliefs
Here at the BBQ experts we have a passion for BBQ food, outdoor living and spending time with family and friends. We offer you; A...
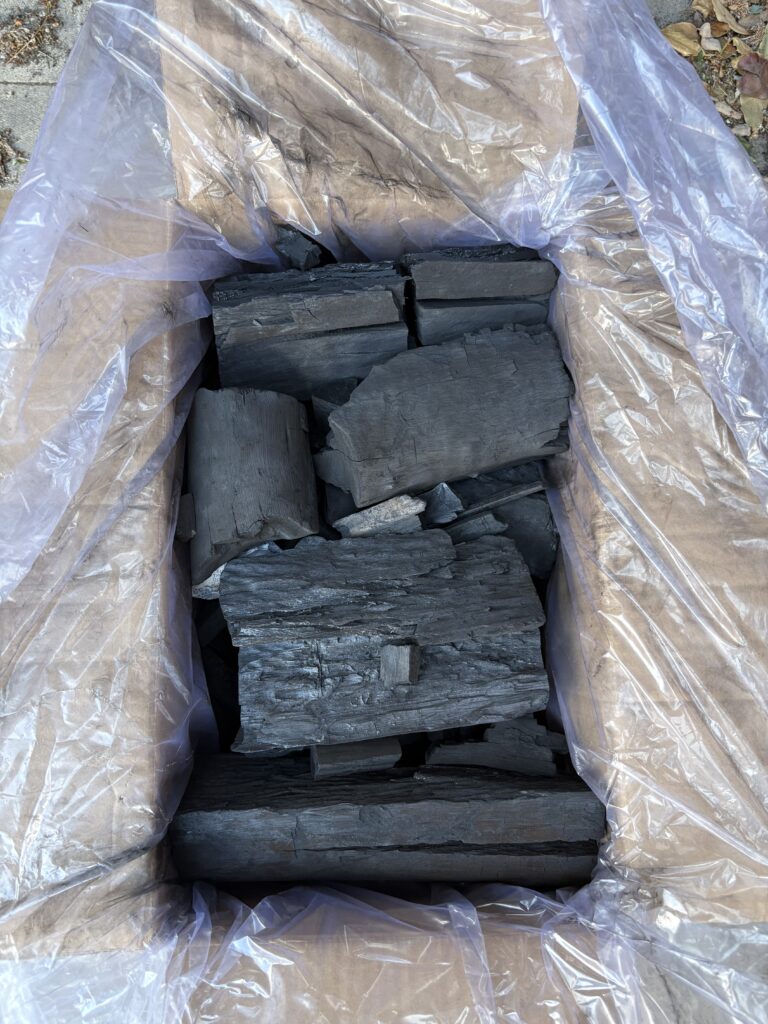
FAQ: Why does Big Ed’s Charcoal have a mix of big and small lumps?
Big Ed’s is all about top-quality, long-burning charcoal, made from a mix of Eucalyptus and Mangrove wood. Each 10kg box is packed with...