
Mastering the Two-Zone Cooking Setup on a Charcoal Grill: The Connoisseur’s Guide
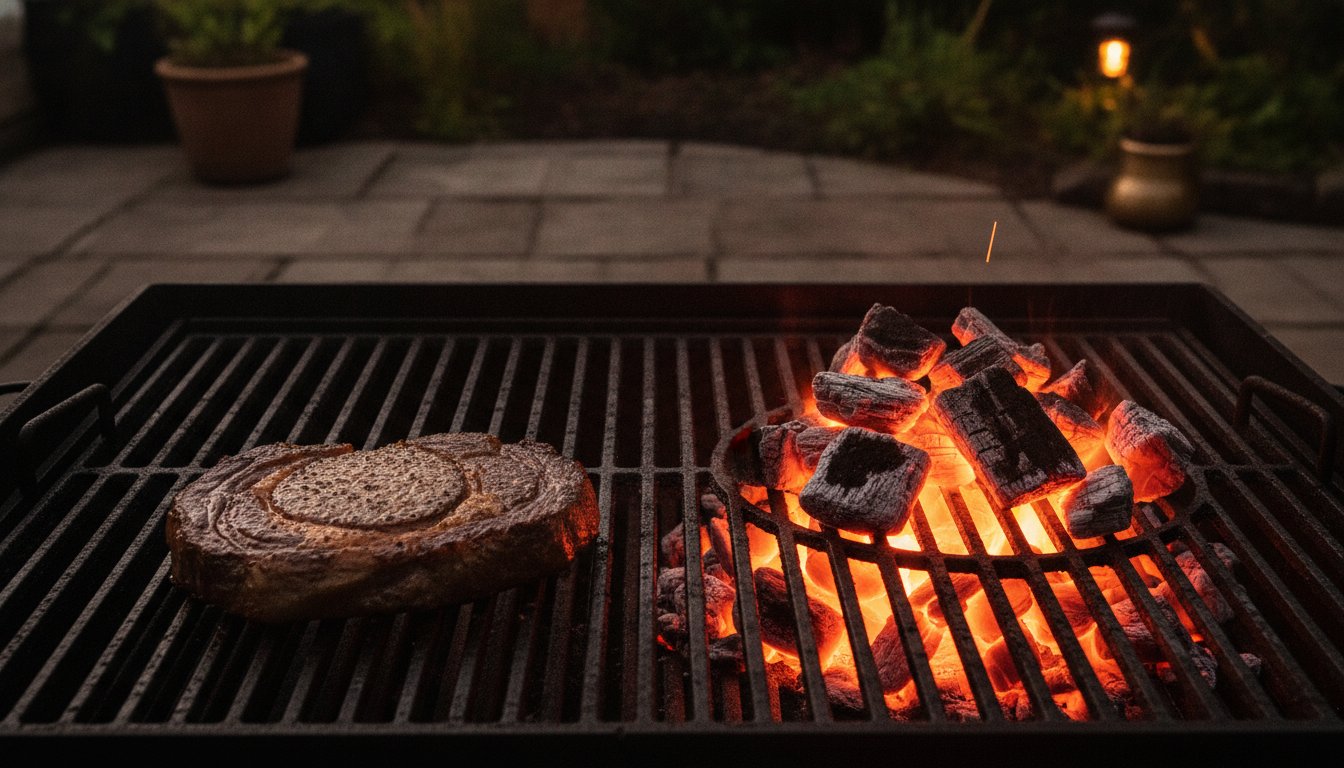
Most backyard cooks treat their grill like a blunt instrument, yet the difference between a charred sacrifice and a culinary masterpiece is simply the architecture of your fire. You’ve likely felt the frustration of a sudden flare-up ruining an expensive ribeye while the centre remains raw, or perhaps you’ve struggled to maintain the low temperatures required for a delicate roast. Mastering a two-zone cooking setup on a charcoal grill is the common hurdle that separates the casual griller from the true outdoor connoisseur who values precision and flavour above all else.
By adopting this method, you’ll transform your outdoor space into a professional gastronomy hub capable of nuanced heat management. This essential technique allows you to sear with ferocity and roast with gentle, indirect heat simultaneously. We’ll explore how to harness the superior thermal properties of Big Eds Charcoal and dense Oak Briquettes to create distinct heat sanctuaries. You’ll learn to manage airflow with confidence, ensuring your Angus & Oink rubs develop a rich, complex bark without ever scorching, ultimately elevating your lifestyle and your craft.
Key Takeaways
- Understand the fundamental architecture of heat by separating radiant searing zones from gentle convection areas to eliminate inconsistent results.
- Master the physical two-zone cooking setup on a charcoal grill using professional-grade Big Eds Charcoal to achieve the thermal stability required for long, indirect cooks.
- Elevate your culinary repertoire with advanced techniques such as the reverse sear, ensuring your premium cuts are juicy and perfectly browned every time.
- Learn how the consistent burn of Oak Briquettes provides the perfect environment for Angus & Oink rubs to develop a complex bark without scorching.
- Discover how to integrate these heat management principles into artisanal hardware like the Fire Cage or a Hibachi Grill for a truly refined outdoor experience.
What is Two-Zone Cooking and Why is it Essential?
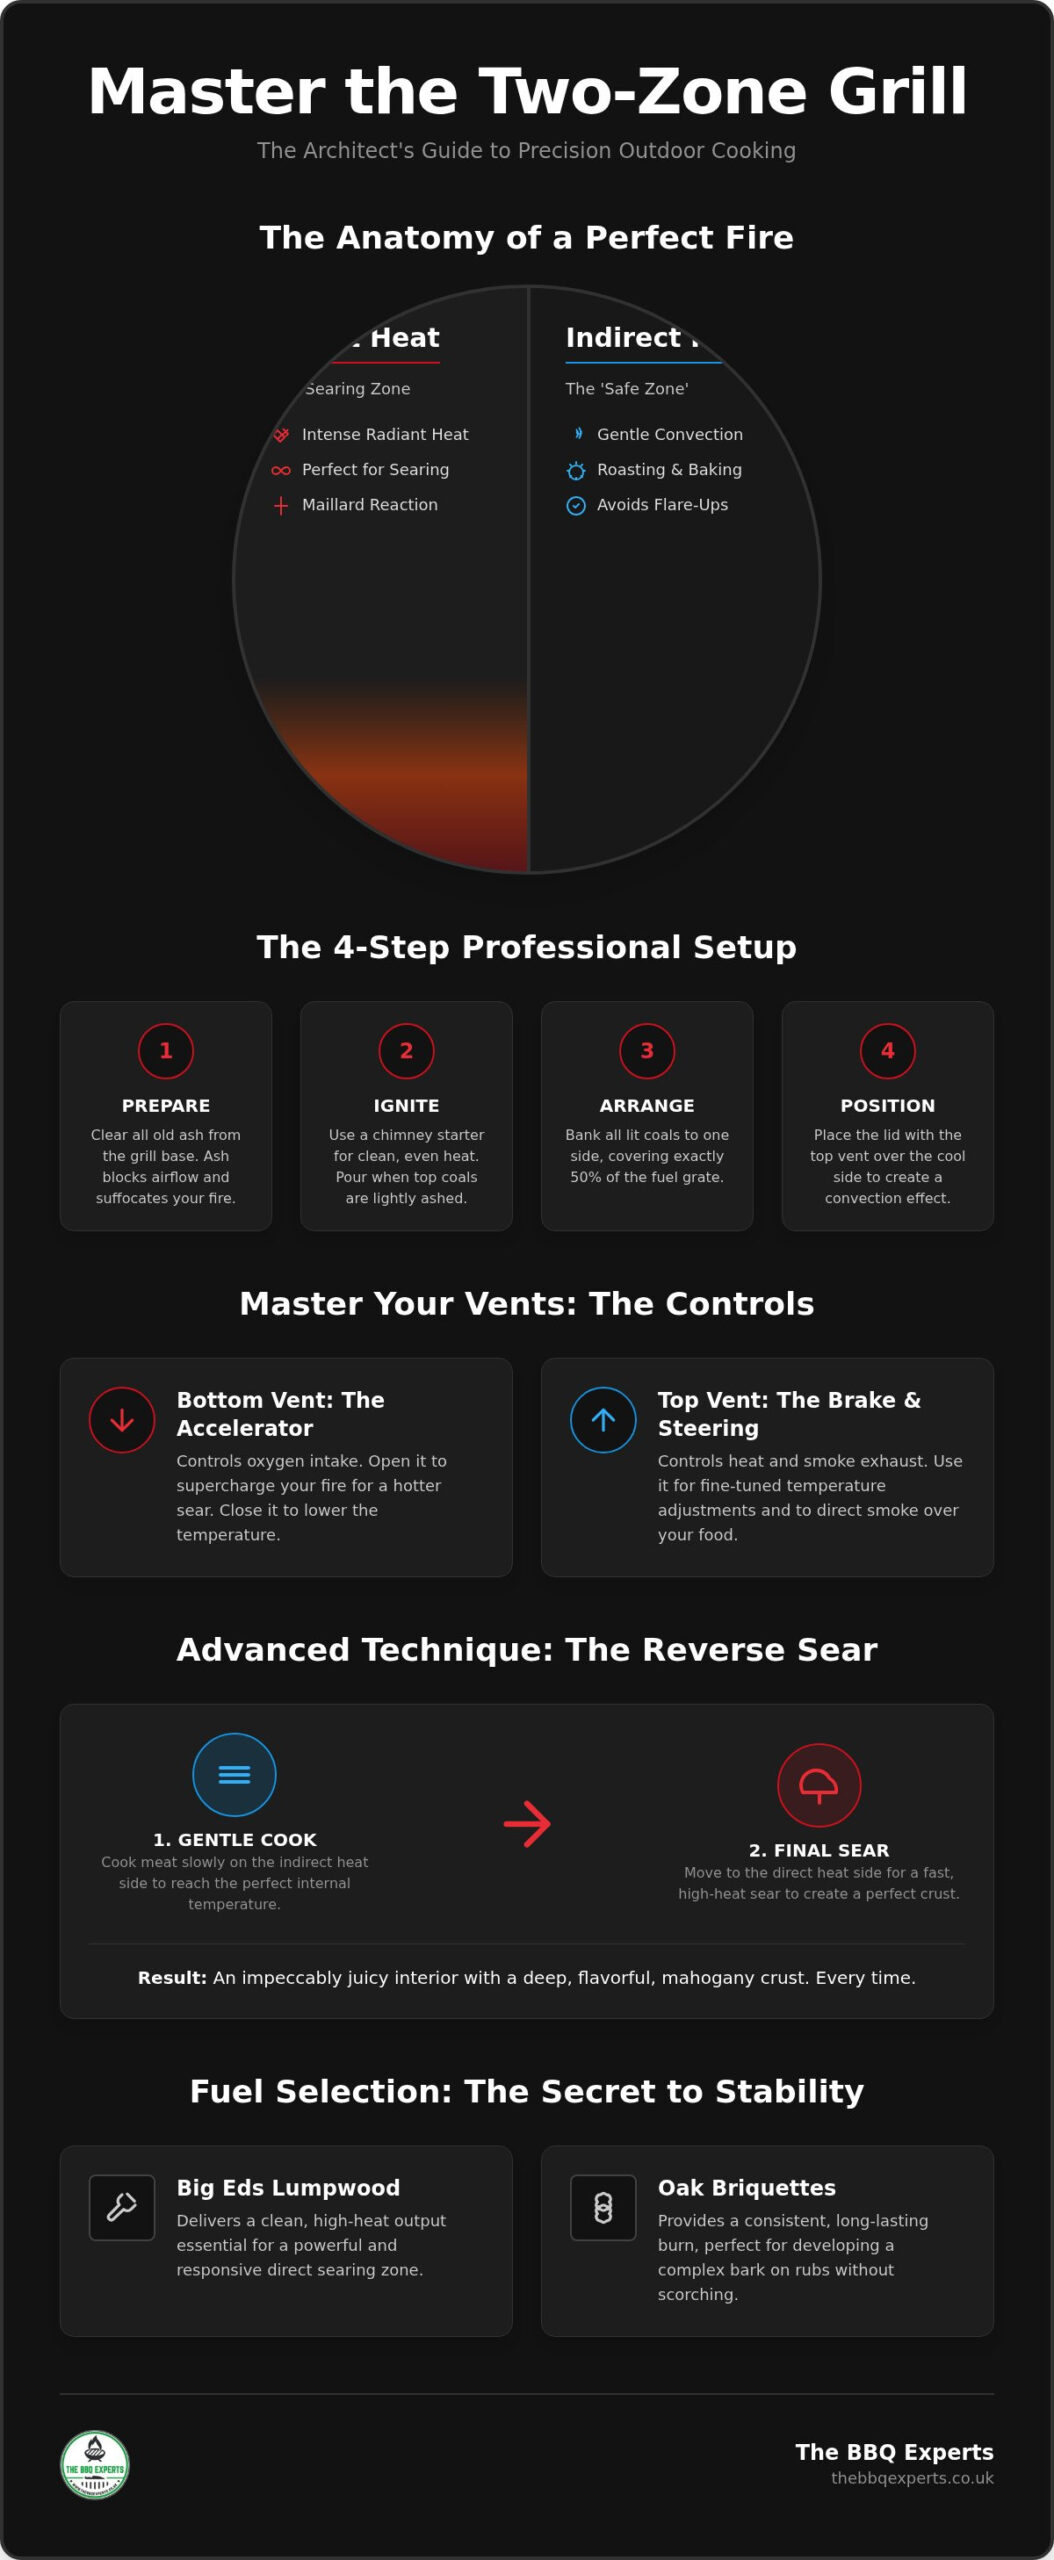
A two-zone cooking setup on a charcoal grill is the cornerstone of professional outdoor gastronomy. It involves the physical separation of your fuel source to one side of the grate, creating two distinct temperature environments within a single chamber. By doing this, you’re no longer at the mercy of an unpredictable fire; you’re the architect of two specific heat profiles: direct and indirect. This method moves beyond simple grilling and into the territory of culinary precision, allowing for a level of control that a single, uniform bed of coals simply cannot provide.
Direct heat provides the intense, radiant energy needed for searing, while indirect heat uses the air inside the grill to roast or bake. This duality is essential for complex cuts of meat that require more than just a quick char. Without this setup, you’re trapped in a cycle of “grill and pray,” often leading to charred exteriors and undercooked centres. Mastering this technique allows you to handle everything from thick, salt-crusted Tomahawk steaks and delicate racks of lamb to succulent whole chickens with the confidence of a seasoned pitmaster.
The Physics of the Grill: Radiation vs. Convection
Understanding the physics of your fire changes how you cook. Radiant heat is the straight-line energy emitted by glowing coals. It’s incredibly intense and perfect for initiating the Maillard reaction, but it’s also unforgiving. When you move food away from the coals, you’re utilizing convection. With the lid closed, the hot air circulates around the meat, cooking it evenly from all sides without the risk of scorching. Thermal equilibrium in a kettle grill occurs when the internal air temperature stabilizes, allowing the indirect zone to mimic the precise environment of a professional convection oven.
The Safety Net: Using the Indirect Zone as a ‘Safe Zone’
Flare-ups are the enemy of high-end cuts. When fat renders and hits white-hot coals, the resulting flames can impart a bitter, acrid taste to your food. The indirect side acts as your safety net. If a flare-up begins, you simply slide the meat to the “safe zone” until the fire subsides. This control is vital for managing the Maillard reaction, allowing you to build a deep, mahogany crust without crossing the line into carbonisation. For a deeper understanding of how different fuels impact these heat zones, consult The Ultimate Guide to Charcoal to refine your foundational fire knowledge. Having a safe harbour for your meat ensures that even the most marbled ribeye remains juicy and pristine.
How to Set Up Your Two-Zone Charcoal Grill
To establish a flawless two-zone cooking setup on a charcoal grill, your journey begins with oxygen management. Before you introduce fire, you must clear the stage. Scrape the grate and remove every trace of spent ash from the base of the bowl. Old ash acts as an insulator and a clog, suffocating the fire and preventing the precise temperature control required for a connoisseur’s results. Once the airway is clear, you’re ready to deploy a premium fuel like Big Eds Grade Finest Lumpwood, which offers the clean, high-heat output necessary for a powerful direct zone.
The physical layout is strict. You must bank your lit coals to one side, occupying exactly 50% of the fuel grate. This creates a sharp thermal divide. To maximise the efficiency of this architecture, place the lid on the grill with the top vent positioned directly over the cool, indirect side. This positioning creates a vacuum effect, pulling the heat and fragrant smoke across your food before it exits, essentially turning your grill into a sophisticated convection oven. If you’re looking to upgrade your current equipment to better handle these thermal demands, our team can provide expert advice on hardware tailored to your cooking style.
The Chimney Starter Method
A chimney starter is the only way to ensure your setup is consistent. It eliminates the need for chemical accelerants that taint the flavour of your meat. Fill the chimney to the brim and light it. You’ll know the coals are ready when the top layer is just beginning to show a delicate coating of grey ash. This indicates the entire column is fully ignited and ready to provide stable heat. When pouring, use heat-resistant gloves and a steady hand to guide the coals into their banked configuration. Precision at this stage prevents stray embers from migrating into your “safe zone.”
Vent Control: The Accelerator and the Brake
Think of your vents as the instruments of a performance car. The bottom vent is your accelerator. By opening it wide, you invite a rush of oxygen that supercharges the hot zone for an aggressive sear. Conversely, the top lid vent acts as your brake and steering. It directs the flow of heat and smoke. To “dial in” a steady indirect temperature between 110°C and 150°C, start with both vents halfway open and make micro-adjustments. Patience is key. Tiny movements of the vent tabs can result in significant changes to the internal environment.
Fuel Selection: The Secret to Temperature Stability
Fuel isn’t merely a source of heat; it’s the engine of your two-zone cooking setup on a charcoal grill. While casual grillers might settle for supermarket-grade lumpwood, the seasoned connoisseur knows that inconsistent fuel leads to unpredictable results. Cheap charcoal often contains chemical binders and small, irregular shards that spark and burn out prematurely, causing the indirect zone’s temperature to fluctuate. For a stable environment, you need “Restaurant Grade” fuels that offer high carbon content and density, ensuring a steady fire that lasts for hours without intervention.
The concept of thermal mass is vital here. Dense charcoal acts as a heat reservoir, radiating a consistent energy level that stabilises the convection side of the grill. This stability is what allows you to roast large joints of meat with the same precision as a professional kitchen. Specific woods like Eucalyptus or King Khaya don’t just provide heat; they offer a sophisticated flavour profile that complements the raw, sensory joy of outdoor gastronomy.
Big Eds Lumpwood vs. Oak Briquettes
Choosing between fuel types depends entirely on your culinary objective. Use Big Eds Restaurant Charcoal when your focus is on the hot zone; its large chunks provide the intense, radiant energy needed to sear a thick cut to perfection. Conversely, Oak Briquettes are the superior choice for low and slow indirect sessions. Their density allows for a slow, controlled release of energy that can maintain a steady temperature for several hours. The uniform size and shape of professional briquettes lead to a predictable temperature curve, giving you total command over the cooking timeline.
Adding Smoke: The Role of Wood Chunks
To elevate your cook from basic to artisanal, introduce wood chunks to the hot zone. As these chunks smoulder, the convection current pulls the fragrant smoke across the indirect side, deeply seasoning the meat. Place your chunks directly onto the glowing coals just before you set your meat on the cool side. You should never soak your wood before adding it to the fire. Wet wood creates steam and acrid, grey smoke that ruins the delicate balance of your flavour profile, whereas dry wood produces the clean, blue smoke desired by professionals.
Pairing wood types with different proteins is the final touch of a master. Oak provides a robust, traditional smoke that pairs beautifully with beef and heavy Angus & Oink rubs. For poultry or pork, consider lighter fruitwoods or the unique, earthy depth of Coffee Charcoal. This attention to detail ensures that every element of the fire contributes to the final, superlative dish.
Advanced Techniques: The Reverse Sear and Beyond
Once you’ve mastered the basic architecture, the two-zone cooking setup on a charcoal grill becomes a playground for advanced gastronomy. It’s no longer just about avoiding burnt edges; it’s about engineering the perfect bite. The most transformative of these methods is the reverse sear. By gently raising the internal temperature of a thick cut in the indirect zone before finishing with a high-heat sear, you achieve an edge-to-edge pink interior that is simply impossible with traditional direct-heat methods. This technique relies on the steady, convection-like environment of the cool side to dry the surface of the meat, which eventually leads to a superior crust.
For the ultimate precision, connoisseurs employ the ‘Cold Grate’ technique. By keeping the grill grate away from the hot coals until the moment you’re ready to sear, you prevent conductive heat from overcooking the bottom of your steak while it’s in the indirect zone. This setup also allows you to manage the ‘Stall’ during larger cooks like brisket or pork shoulder. The indirect zone provides the stable, humid environment needed to push through the evaporative cooling phase without drying out the exterior of your joint. If you’re looking to refine your hardware to support these professional methods, speak with our specialists today for a bespoke equipment consultation.
Mastering the Reverse Sear for Thick Steaks
The secret to a world-class Tomahawk or Ribeye lies in the internal temperature targets. Place your seasoned meat on the indirect side and aim for an internal temperature of approximately 45°C for a perfect medium-rare finish. Once you hit this mark, remove the meat and let it rest for at least ten minutes. This rest is non-negotiable; it allows the muscle fibres to relax and the juices to redistribute. During this interval, open your vents to supercharge the hot zone. When you return the meat to the coals, use high-quality Angus & Oink Rubs to create a deep, caramelised bark that provides a sensory contrast to the tender interior.
The ‘Just-in-Time’ Service: Keeping Food Warm
The two-zone cooking setup on a charcoal grill also serves as a sophisticated holding area, turning your outdoor space into a functional kitchen. The far edge of the indirect zone is a sanctuary for completed items, keeping them at serving temperature without further cooking. This is far superior to an indoor oven, which often lacks the humidity and gentle airflow of a charcoal grill. To maintain maximum moisture during a long rest, place a small water pan on the fuel grate beneath the meat. This introduces a subtle steam that preserves the integrity of the crust while ensuring the interior remains succulent until the very moment of service.
Essential Hardware for the Professional Setup
Technique provides the soul of outdoor gastronomy, but your hardware forms the architectural foundation. A professional two-zone cooking setup on a charcoal grill is vastly improved by the use of charcoal baskets. These stainless steel containers act as a physical barrier, preventing fuel migration and ensuring your indirect “safe zone” remains truly cool. Without them, stray embers can easily slide across the fuel grate, creating hot spots that threaten the delicate convection process. By containing your fire, you gain the ability to move the heat source itself, giving you total command over the internal environment.
Mastering heat zones isn’t limited to the traditional kettle grill. You can adapt a two-zone cooking setup on a charcoal grill of any style, including the artisanal Hibachi Grill. On these compact, high-performance tools, you manage zones by stacking charcoal at varying depths, creating a gradient of heat across the small surface area. For those who prefer the raw, sensory joy of open-fire cooking, the Fire Cage offers a vertical approach to heat management. By adjusting the height of your grates or the intensity of the central fire, you create thermal sanctuaries for different proteins, elevating your outdoor space into a refined culinary retreat.
Maintenance for Consistency
The longevity of your equipment and the consistency of your cooks depend on meticulous maintenance. A clean grill base is essential for vent precision; even a small accumulation of ash can obstruct the bottom vents, making it impossible to “dial in” the steady temperatures required for long indirect sessions. Regularly season your cast iron grates with high-smoke-point oils to prevent sticking during the high-heat sear phase. This practice ensures a smooth release and a superlative finish every time you cook. To ensure your hardware has the best possible energy source, stock up on premium Big Eds Charcoal and Oak Briquettes here. By investing in professional-grade tools and fuels, you’re not just buying hardware; you’re upgrading your capability and your lifestyle status as a true master of the craft.
Elevate Your Outdoor Gastronomy
Mastering the two-zone cooking setup on a charcoal grill is the definitive step toward culinary excellence in your own backyard. You’ve learned that heat isn’t just about intensity; it’s about architecture. By separating radiant searing power from gentle convection, you gain the control needed for everything from delicate desserts to thick, salt-crusted steaks. This transition from basic grilling to professional-grade gastronomy relies on the synergy of technique, high-performance hardware, and superior fuel.
Whether you’re perfecting the reverse sear or managing a long, indirect roast, the tools you choose define your success. We invite you to upgrade your fuel and hardware at The BBQ Experts, where you’ll find an expertly curated range of Big Eds charcoal and Angus & Oink rubs. Our seasoned pitmasters are always on hand with specialist advice to help you refine your craft, and we offer national delivery on bulk fuel pallets to keep your fire burning. Step into your new role as a master of the flame; your next masterpiece is just one light away.
Frequently Asked Questions
Can I do two-zone cooking on a small portable charcoal grill?
You can definitely achieve a two-zone cooking setup on a charcoal grill even on compact models like a Thuros or a Hibachi. The challenge is the limited surface area, so you must bank your coals tightly to one extreme side. This creates a small but effective safe zone on the opposite side. It’s perfect for smaller cuts like chicken thighs or sausages that need a gentle finish after an initial sear.
How do I stop the charcoal from going out on the hot side during a long cook?
Maintaining a consistent fire requires using high-density fuels like Oak Briquettes or Big Eds Restaurant Charcoal. These professional fuels offer a much longer burn time than standard supermarket lumpwood. Ensure your bottom vents remain clear of ash buildup to allow a constant stream of oxygen. If the temperature dips, add a few unlit briquettes to the existing pile; they’ll ignite gradually and sustain the heat.
Should the lid be open or closed during two-zone cooking?
Keep the lid closed whenever you’re utilizing the indirect zone. This traps the heat and creates the convection current necessary to cook the food evenly from all sides. You should only open the lid when you’re actively searing over the direct zone or checking internal temperatures. Frequent opening dissipates the oven effect, extending your cook time and wasting precious fuel while ruining the thermal stability you’ve worked to build.
What is the best temperature for the indirect zone of my grill?
For most indirect roasting and low and slow sessions, aim for a steady temperature between 110°C and 135°C. This range is ideal for breaking down tough connective tissues in larger joints while keeping the meat succulent. If you’re roasting poultry, you might push the indirect zone to 150°C to help render fat and crisp the skin, ensuring a professional, gourmet finish that matches the quality of your hardware.
Can I use two-zone cooking for vegetables, or is it just for meat?
This technique is exceptional for vegetables, especially those with high sugar content or dense structures. Root vegetables like carrots or halved peppers benefit from starting on the indirect side to soften through convection. You can then move them to the direct zone for a final, high-heat char. It prevents the exterior from burning before the centre is tender, which is a common pitfall in basic outdoor cooking.
What happens if my direct zone isn’t hot enough for a good sear?
If your sear is lackluster, it’s usually an airflow or fuel volume issue. Open your bottom vents fully to invite more oxygen, or use a chimney starter to pre-light a small batch of fresh coals before adding them to the hot side. Ensure you’re using a high-carbon fuel like Big Eds, which is designed to reach the extreme temperatures required to trigger a deep, mahogany Maillard reaction on your steaks.
How do I manage two zones if I don’t have a lid on my grill?
Without a lid, you lose the convection heat needed for the indirect zone. You can compensate by using a Fire Cage for vertical heat management or by creating a temporary foil tent over the food on the cool side. This traps some radiant heat and moisture, though it won’t be as efficient as a dedicated kettle grill. It’s a useful workaround for open-fire enthusiasts looking for precision in a rustic environment.
Is two-zone cooking the same as smoking?
While they share similarities, a two-zone cooking setup on a charcoal grill is the architectural foundation for smoking, not the same thing. Smoking specifically involves adding wood chunks and maintaining much lower temperatures over a longer duration. Two-zone cooking is a broader heat management technique that allows you to roast, bake, and sear with total control, whether you’re adding intense smoke flavour with Oak Charcoal or keeping it clean.
Disclaimer
This article was produced with AI assistance. We use AI and Third Parties to help deliver more content to our BBQ website and community, but we always aim to ensure accuracy and quality as much as we can. If you spot anything that doesn't seem right, we'd love to hear from you

Recent News & Updates

Our Story, Values and Beliefs
Here at the BBQ experts we have a passion for BBQ food, outdoor living and spending time with family and friends. We offer you; A...
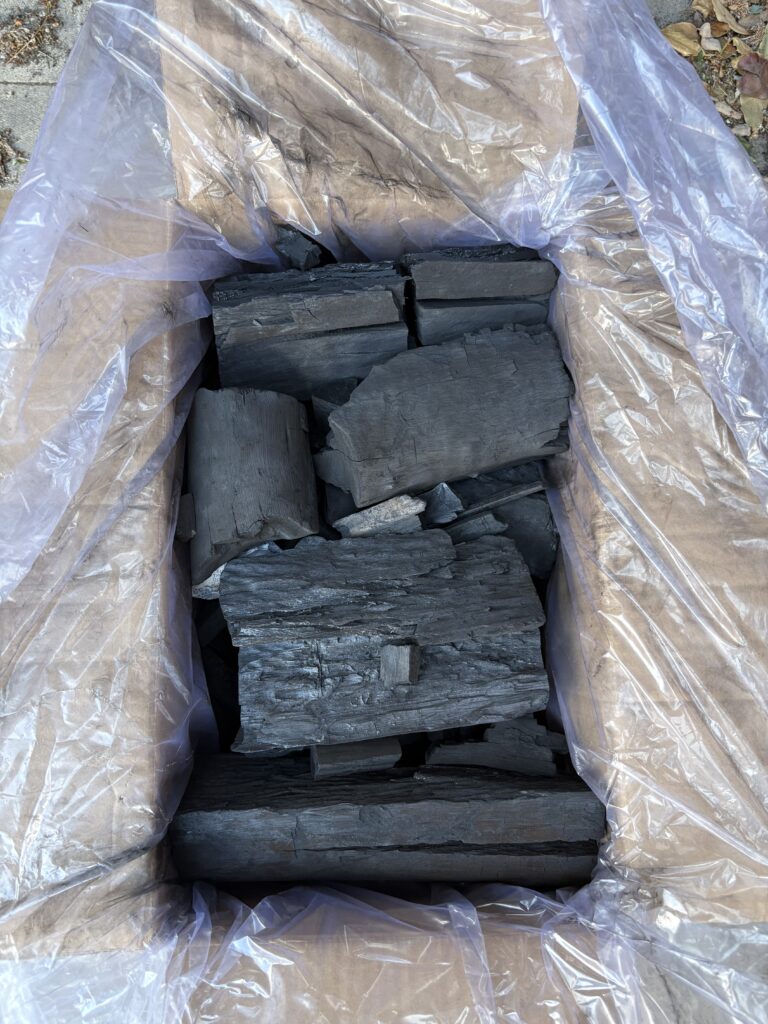
FAQ: Why does Big Ed’s Charcoal have a mix of big and small lumps?
Big Ed’s is all about top-quality, long-burning charcoal, made from a mix of Eucalyptus and Mangrove wood. Each 10kg box is packed with...