
Mastering the Flame: How to Control Heat on a Fire Cage (2026 Guide)
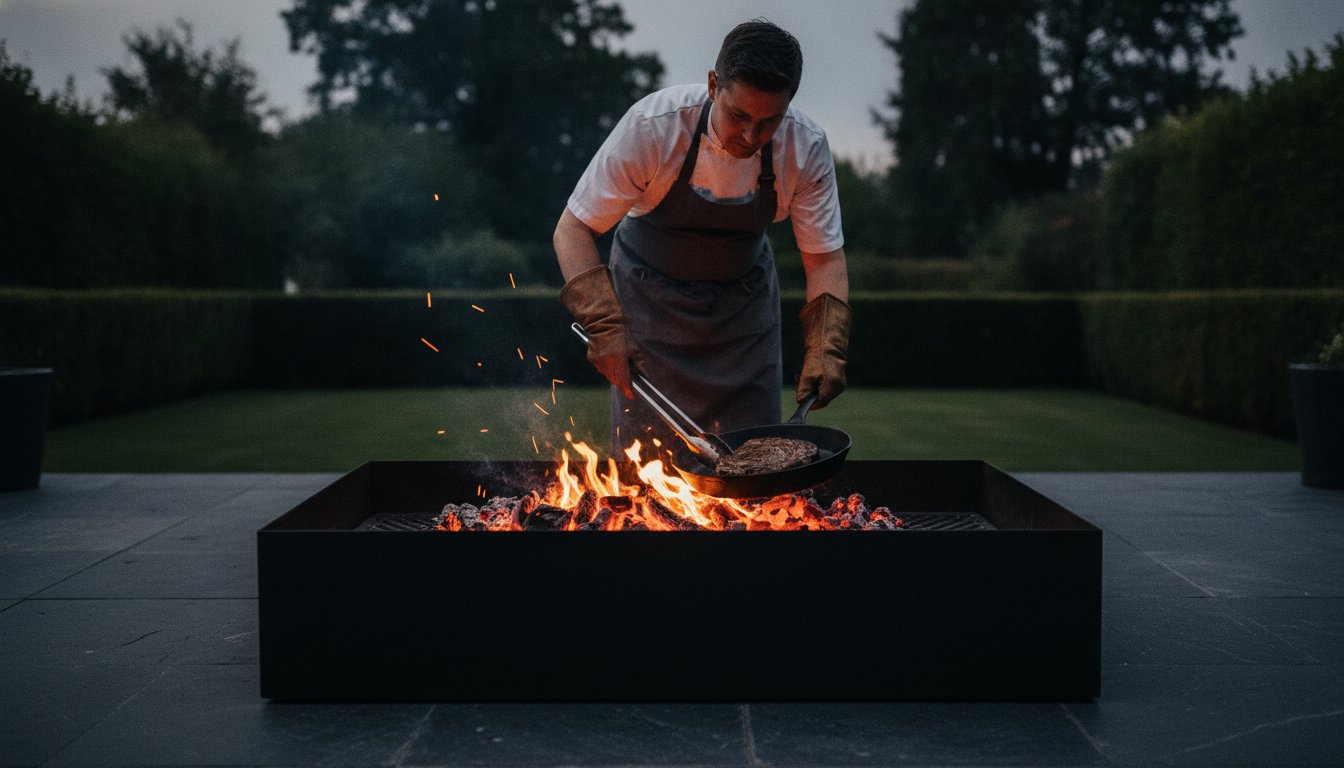
The most common misconception in outdoor gastronomy is that the absence of a temperature dial means a loss of control. In reality, the Fire Cage offers a level of nuance that no gas burner can replicate, provided you understand that distance is your dial and fuel density is your thermostat. If you’ve struggled with inconsistent temperatures or the heartbreak of a charred exterior hiding a raw center, you’re not alone in your frustration. Mastering how to control heat on a fire cage is the defining line between a backyard hobbyist and a true connoisseur of the flame.
You deserve to command your terrace with the confidence of a professional chef. This guide promises to transform your approach by teaching you how to manipulate thermal zones and manage high-density fuels like Big Eds Charcoal and Oak Briquettes for sustained, predictable heat. We’ll explore the art of fuel stacking, the physics of airflow, and the expert distance techniques required to achieve a professional-grade sear. By the end of this journey, your outdoor cooking area will become a refined sanctuary of culinary precision where you dictate the temperature of every ember.
Key Takeaways
- Shift your mindset from adjusting vents to architecting your fuel bed for consistent, high-density thermal stability.
- Learn how to control heat on a fire cage by mastering the vertical axis, where minor height adjustments yield significant temperature shifts.
- Discover why professional-grade fuels like Big Eds Charcoal act as the essential engine for long-duration, precision cooking sessions.
- Master the “Hand Test” and spatial movement strategies to manage flare-ups without sacrificing the raw, smoky profile of your ingredients.
- Understand the “Sugar Burn Point” and how to pair Angus & Oink rubs with high-heat environments for a flawless, professional finish.
Command Your Hearth: Understanding Heat Control in a Fire Cage
Imagine an environment where the air flows freely, unencumbered by the restrictive lids or dampers of a traditional grill. This is the world of the Fire Cage. Unlike a standard kettle BBQ that functions like a small convection oven, a Fire Cage is a radiant hearth. It’s a professional-grade culinary structure designed for those who seek the raw, sensory joy of open-fire cooking. Because oxygen is essentially unlimited in this setup, the traditional method of “vent control” is obsolete. Instead, you must master the architecture of your fuel and the precise proximity of your ingredients to the glowing embers.
Achieving live-fire precision is the hallmark of a seasoned outdoor connoisseur. It requires a fundamental shift in strategy. In an enclosed grill, you manage temperature by starving the fire of air. On a Fire Cage, you manage it by sculpting the fire itself. By learning how to control heat on a fire cage, you transform your terrace into a high-performance kitchen where every variable is managed through deliberate, manual adjustments rather than a plastic dial.
The Three Pillars of Fire Cage Temperature
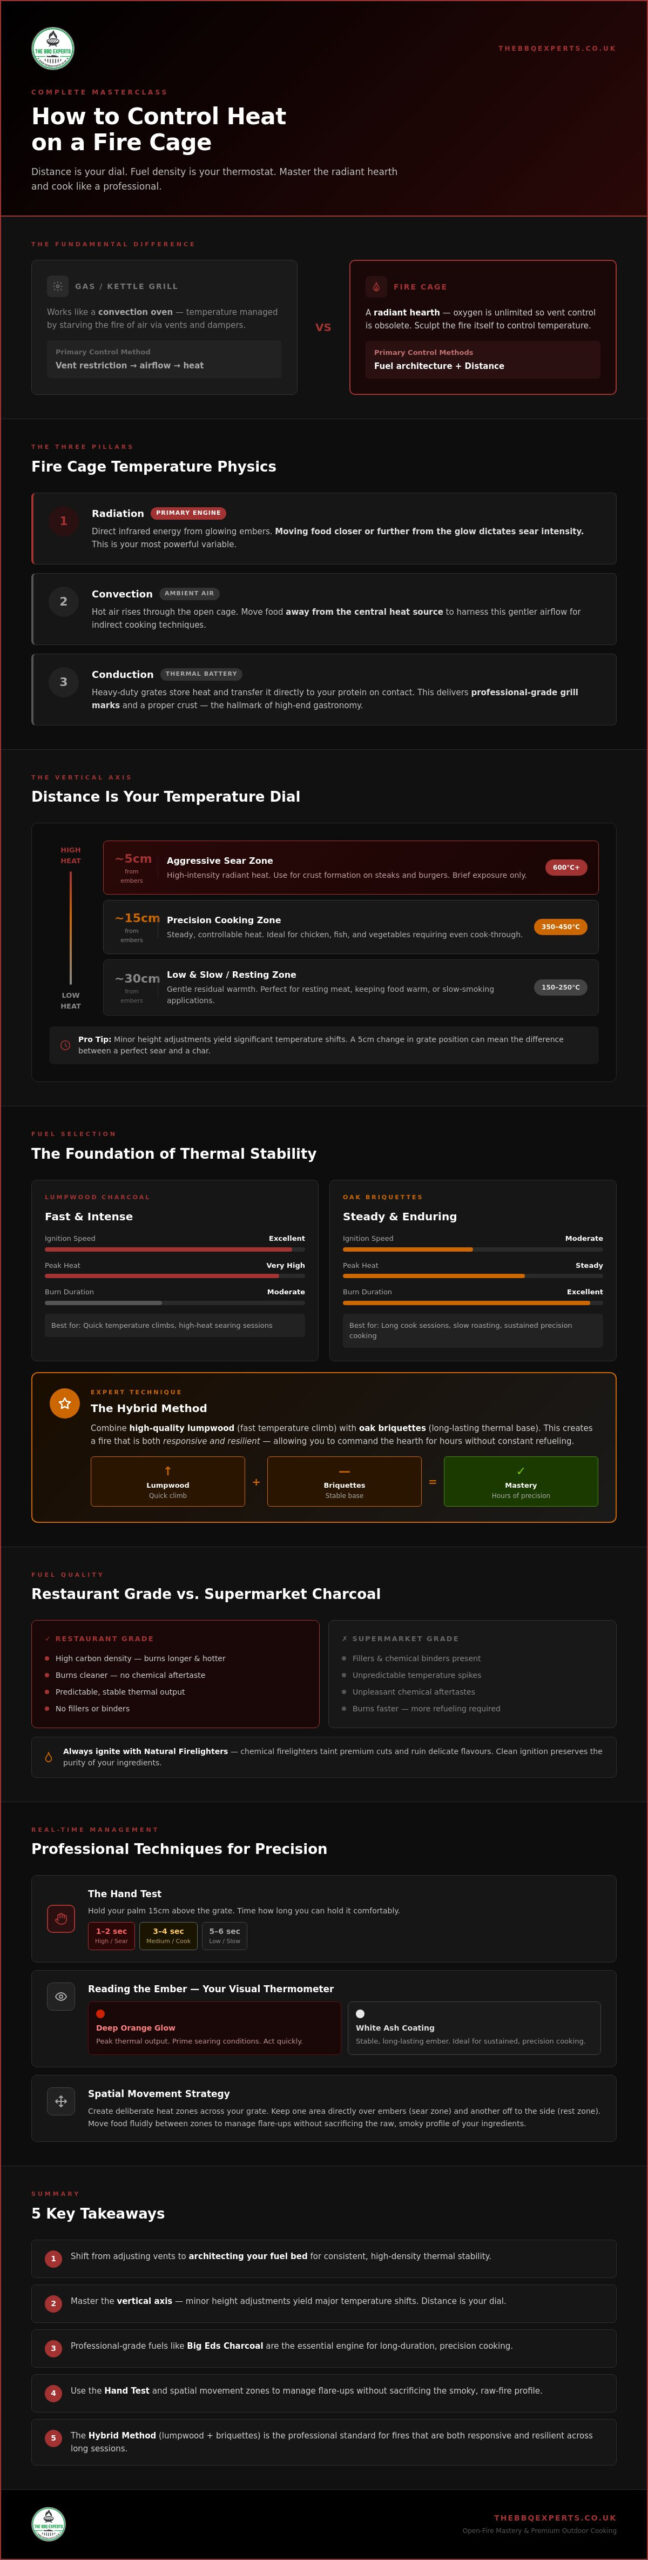
- Radiation: This is the primary engine of your cook. It’s the direct, infrared energy emitted by glowing embers. By moving your meat closer to or further from this glow, you dictate the intensity of the sear.
- Convection: Even in an open-air environment, ambient air movement plays a role. Hot air rises through the cage, creating a gentle flow that can be harnessed for indirect grilling techniques when you move food away from the central heat source.
- Conduction: Your heavy-duty grates act as thermal batteries. When they come into contact with your protein, they transfer heat directly, creating those coveted, professional-grade grill marks that define high-end gastronomy.
Why Live Fire Demands a Different Mindset
Cooking on a Fire Cage isn’t a “set and forget” endeavour. It’s an active, sensory experience that demands your presence and intuition. You’ll learn to read the fire like a map, looking for the deep orange glow of peak thermal output or the white ash that signals a stable, long-lasting ember. This is where premium fuels, such as Big Eds Gourmet Mix, become essential tools rather than mere commodities. They provide the predictable, high-density energy needed to maintain a radiant sanctuary for your food.
The Fire Cage serves as the social hub of the home, drawing guests toward the warmth and the spectacle of the flame. It’s a lifestyle upgrade that rewards patience and skill with unparalleled flavour. Understanding how to control heat on a fire cage is about more than just cooking; it’s about commanding the exterior environment to create a private retreat of culinary excellence.
Selecting Your Fuel: The Foundation of Thermal Stability
Think of your fuel as the engine of your Fire Cage. If you feed it low-quality, inconsistent materials, you’ll inevitably face erratic temperatures and frustrating results. Precision is impossible without stability. When you’re learning how to control heat on a fire cage, your choice of fuel is the most critical decision you’ll make before the first spark is even struck. Professional-grade options like Big Eds Charcoal are engineered for high-density heat, providing the steady thermal output required for masterful outdoor gastronomy.
While lumpwood provides immediate intensity, Oak Briquettes offer the endurance needed for longer sessions. The most seasoned chefs often employ a “Hybrid Method.” By combining high-quality lumpwood for a quick temperature climb with briquettes for a long-lasting, stable thermal base, you create a fire that is both responsive and resilient. This synergy allows you to command the hearth for hours without constant refueling. This is a key component of effectively managing your cooking environment and ensuring your guests are served with precision and grace.
The Science of High-Density Charcoal
The secret to a predictable fire lies in carbon density. High-density Restaurant Grade Charcoal burns cleaner and longer than standard supermarket brands. Those cheaper alternatives are often riddled with fillers and chemical binders that lead to unpredictable temperature spikes and unpleasant aftertastes. To ensure the purity of your flavours, always start your fire with Natural Firelighters. They provide a clean ignition without the harsh chemical taints that can ruin a premium cut of meat or a delicate vegetable.
Building the Thermal Battery
Commanding your heat requires more than just throwing fuel into the cage; it requires building a thermal battery. Stack your fuel strategically to create a concentrated, glowing ember bed that radiates heat upward with consistency. It’s essential to distinguish between the “active flame” used for high-heat searing and the “white coals” preferred for roasting. A non-negotiable 30-minute lead time allows your fuel to reach this stable, ashed-over state. This patience ensures that when you begin, the heat is deep and penetrating rather than fleeting. If you’re unsure which fuel combination suits your specific setup, you can always reach out to our seasoned connoisseurs for bespoke advice on how to control heat on a fire cage through superior fuel selection.
The Art of Distance: Using Proximity and Zones
The Fire Cage is more than a grill; it’s a three-dimensional thermal landscape. Once you’ve established a stable ember bed with premium fuel, your primary method of regulation shifts from the fire itself to the physical space between the heat and your ingredients. When you master how to control heat on a fire cage, you stop thinking in terms of “high” or “low” and start thinking in terms of gradients and proximity. The vertical axis is your most powerful tool for precision, allowing you to move food through different climate zones with a simple adjustment of the grate or hook.
Understanding the “Inverse Square Law” is essential for any serious outdoor chef. In simple terms, radiant heat intensity decreases sharply as distance increases. If you move your protein twice as far from the glowing coals, you aren’t just losing half the heat; you’re receiving only one-quarter of the energy. This scientific reality is why minor height adjustments on your Fire Cage produce such massive shifts in temperature. For larger cuts, the structure allows you to hang proteins for slow-roasting, using the rising warm air to gently cook the meat while keeping it safely away from the aggressive direct radiation of the base.
Vertical Heat Graduation
- Level 1 (The Sear Zone): Positioned at the lowest setting, this is where you harness maximum radiant energy. It’s the ideal height for achieving a perfect Maillard reaction on steaks or creating a crisp, professional-grade crust.
- Level 2 (The Roast Zone): Mid-height placement offers a balanced environment. Here, the heat is intense enough to cook through a thick cut of meat without scorching the exterior, ensuring consistent thermal penetration.
- Level 3 (The Rest Zone): The top tier is your sanctuary for gentle finishing. Use this height for rendering fat on a picanha or allowing a rested joint to stay warm without continuing to cook aggressively.
Creating Lateral Micro-Climates
Precision isn’t just about height; it’s about horizontal architecture. By banking your fuel to one side of the cage, you create a “Two-Zone” setup. This allows you to sear over the intense heat on one side before sliding the ingredient to the cooler side to finish. The edges of the Fire Cage are perfect for delicate items like seasonal vegetables or seafood that require a softer touch. Always maintain a “Cold Spot” — a small area with no direct fuel underneath. This serves as your emergency exit, a place to move food instantly if a flare-up occurs or if the internal temperature is climbing too quickly. Mastering how to control heat on a fire cage means always having a spatial plan for every ingredient on the grate.
Real-Time Management: Professional Techniques for Precision
Once your fuel architecture is established and your zones are set, the cook becomes a live performance. You must develop a sensory connection to the thermal environment to truly excel. Learning how to control heat on a fire cage requires more than just looking at the fire; you must feel it. While digital probes have their place, the seasoned connoisseur relies on intuition and physical cues to manage the hearth in real time. This active engagement is what separates a simple meal from a Michelin-starred terrace experience.
The “Hand Test” remains the most reliable method for estimating temperature without a thermometer. To perform this, safely place your palm roughly 10cm above the cooking grate. Count the seconds until the heat becomes uncomfortable. This technique allows you to gauge the radiant intensity across different areas of your cage instantly, helping you decide whether to adjust the grate height or move your ingredients laterally.
The Hand Test Temperature Scale
- 2-3 Seconds (High Heat): This is the prime zone for searing steaks and achieving a deep Maillard reaction. The energy is aggressive and immediate.
- 5-7 Seconds (Medium Heat): Ideal for roasting poultry or thicker cuts that require steady, penetrating warmth without scorching the skin.
- 8-10 Seconds (Low Heat): Perfect for delicate fish, smoking, or gentle warming. This zone allows fat to render slowly and flavours to develop with patience.
Taming the Flare-Up
Flare-ups happen. When fat drips onto high-density embers, the resulting flames can be spectacular but dangerous for your crust. Never reach for a spray bottle. Water creates steam that washes away your seasoning and drops the temperature of your coal bed instantly, ruining your thermal stability. Instead, move the protein to your designated “Cold Spot” until the fire subsides. For persistent intensity, use a small amount of ash to dampen the embers. This ancient technique reduces oxygen access to specific coals without extinguishing them. Always watch your smoke; thin, blue wisps indicate a clean, high-heat burn, while thick, acrid black smoke suggests dripping fat is burning off. Adjust your spatial positioning immediately to maintain flavour purity.
Active coal management is your final lever of control. Use long-handled tongs to refresh the “hot spot” under your grate by moving glowing embers from the periphery to the centre. This ensures your thermal battery remains charged throughout the session. Positioning your cage relative to the wind is also vital. A gentle breeze can act as a natural bellows, boosting oxygen and heat, but a gale will steal your ambient warmth. If you need bespoke guidance on setting up your outdoor sanctuary for peak performance, get in touch with our expert mentors for professional advice on how to control heat on a fire cage in any environment.
Beyond the Heat: Enhancing Your Fire Cage Gastronomy
Mastering how to control heat on a fire cage provides the technical foundation, but the true artistry lies in how you layer flavour upon that precision. Once you’ve established your thermal zones and mastered the vertical axis, the final element is the seasoning. High-performance tools require high-performance ingredients, which is why Angus & Oink Rubs are the definitive choice for the serious outdoor chef. These blends are specifically crafted to withstand the intense radiant energy of a live fire, ensuring your seasoning enhances rather than obscures the natural profile of your ingredients.
Understanding the “Sugar Burn Point” is a critical skill for any expert mentor. Most commercial rubs contain high levels of sugar, which caramelises beautifully at lower temperatures but turns acrid and bitter when exposed to the direct radiation of a high-intensity sear. For those moments when you’re cooking close to the embers, choose salt-forward, savoury profiles that can handle the heat. You can then introduce more complex, sugar-containing rubs once you move the protein to the roast or rest zones. Pairing these profiles with the clean, consistent smoke from Oak Briquettes creates a depth of flavour that is impossible to replicate in an indoor kitchen.
Seasoning for the Flame
Timing is everything when working with open fire. Applying rubs too early can lead to unwanted moisture loss, while applying them too late prevents the development of a professional-grade bark. We recommend a two-stage approach: a base layer of salt and pepper for the initial sear, followed by a mid-cook application of your chosen Angus & Oink profile. This allows the heat to set the seasoning without scorching the delicate spices. As you refine how to control heat on a fire cage, you’ll see the bark evolve into a rich, mahogany crust that serves as the hallmark of a master. Profiles like ‘Dirty Cow’ or ‘Texas Steak’ are particularly robust, standing up to the aggressive radiation of glowing embers without losing their unique character.
The Social Heart of the Home
Mastering the Open-Air Hearth
Transitioning from a standard grill to a Fire Cage is a journey of sensory discovery. You’ve learned that thermal stability begins with the engine of your fire, using high-density fuels like Big Eds Charcoal and Oak Briquettes to create a resilient ember bed. By mastering the vertical axis and the “Hand Test,” you’ve gained the precision needed to treat every ingredient with the respect it deserves. Mastering how to control heat on a fire cage isn’t just about technical skill; it’s about transforming your terrace into a sanctuary of professional-grade gastronomy.
As UK specialists in Angus & Oink rubs and premium charcoal, we provide the expert-curated hardware and fuels required for the serious outdoor chef. We offer national delivery on all professional-grade fuels to ensure your hearth is always ready for the next performance. If you’re ready to elevate your skills and invest in a lifestyle of culinary excellence, reach out to our expert mentors today to find the perfect setup for your home. The fire is waiting. It’s time to claim your place as a master of the flame.
Frequently Asked Questions
How do I stop flare-ups on a Fire Cage without using water?
Manage flare-ups by moving your ingredients laterally to a cooler zone or increasing the vertical distance from the embers. Dousing the fire with water is a common mistake that ruins your thermal stability and washes away the delicate seasoning on your food. If the flames persist, use a small amount of ash to dampen the intensity of specific embers. This reduces oxygen access without extinguishing the heat source entirely.
What is the best fuel for a long, slow cook on a Fire Cage?
Oak Briquettes are the superior choice for long-duration sessions because of their exceptional density and steady burn rate. Unlike standard lumpwood which provides a quick burst of energy, these briquettes act as a reliable thermal battery. They maintain a consistent temperature for hours, allowing you to focus on the artistry of the cook rather than constantly refueling your hearth. This stability is essential for achieving professional-grade results.
Can I use regular wood in my Fire Cage for heat control?
Seasoned hardwood is excellent for adding aromatic smoke profiles, but it is far less predictable than professional-grade charcoal. For precise heat management, use high-density charcoal as your primary engine and introduce wood chunks only for flavour. Unseasoned or “regular” wood often contains moisture that leads to erratic temperature swings and acrid smoke. Always ensure your wood is kiln-dried or thoroughly seasoned to maintain a clean, high-performance burn.
How do I know when the embers are ready for cooking?
Wait for your fuel to develop a fine layer of white ash and a deep orange core before placing any food on the grates. This ashed-over state indicates that the initial volatile gases have burnt off and the heat has stabilised. Cooking too early over active flames often results in a soot-covered exterior and uneven internal temperatures. A patient 30-minute lead time ensures your Fire Cage is a radiant sanctuary for your ingredients.
Is it possible to bake or roast on an open-fire cage?
Roasting is easily achieved by hanging proteins from the top of the cage or using the higher tiers for gentle radiant heat. The open-air structure allows for excellent convection as warm air rises through the cooking zones. While you won’t have the trapped moisture of an enclosed oven, you can create a similar environment by using a heavy-duty cast iron pan or a cloche. This adds a sophisticated dimension to your outdoor gastronomy.
How does wind affect the temperature of my Fire Cage?
Wind introduces a surge of oxygen that can cause your fire to burn hotter and faster than intended. It acts as a natural bellows, spiking the temperature and potentially scorching your ingredients. Understanding how to control heat on a fire cage means accounting for these environmental variables by positioning your setup in a sheltered area. If a breeze picks up, be prepared to raise your grates to compensate for the increased thermal output.
Do I need a thermometer for open-fire cooking?
An instant-read thermometer is a valuable tool for food safety, but it cannot replace the sensory intuition of the Hand Test for managing the hearth. Learning how to control heat on a fire cage involves mastering these physical cues to judge radiant intensity in real time. Use a probe to confirm the final internal temperature of your protein, but rely on your palm and the glow of the embers to dictate your spatial adjustments during the cook.
Disclaimer
This article was produced with AI assistance. We use AI and Third Parties to help deliver more content to our BBQ website and community, but we always aim to ensure accuracy and quality as much as we can. If you spot anything that doesn't seem right, we'd love to hear from you

Recent News & Updates

Our Story, Values and Beliefs
Here at the BBQ experts we have a passion for BBQ food, outdoor living and spending time with family and friends. We offer you; A...
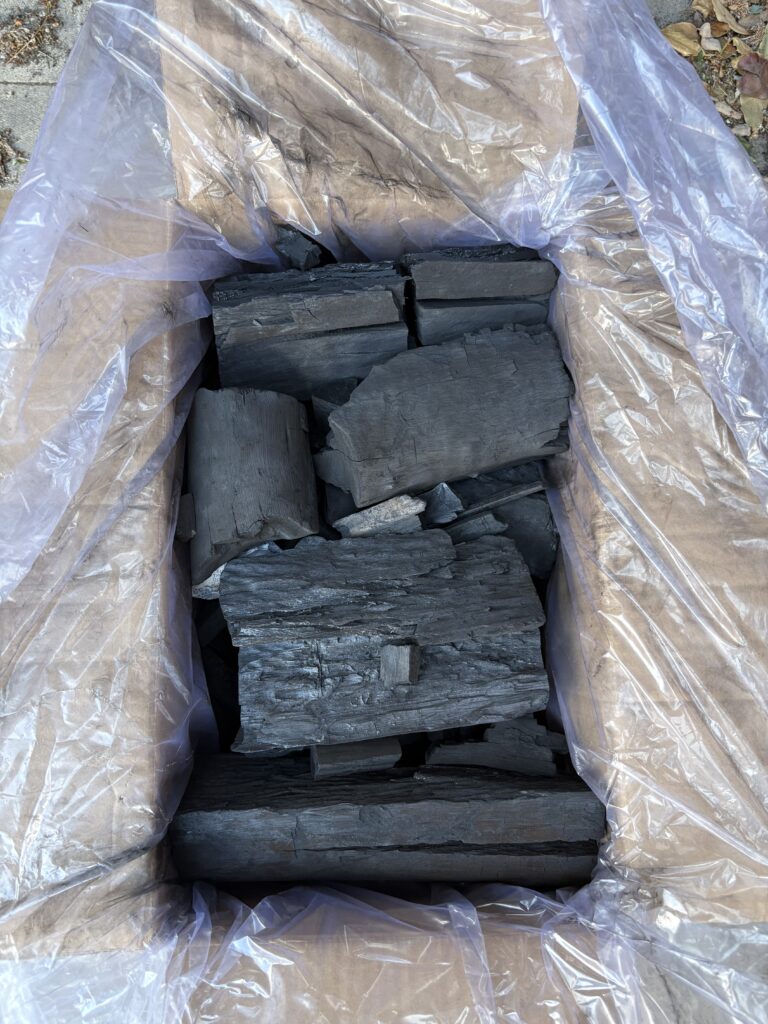
FAQ: Why does Big Ed’s Charcoal have a mix of big and small lumps?
Big Ed’s is all about top-quality, long-burning charcoal, made from a mix of Eucalyptus and Mangrove wood. Each 10kg box is packed with...